Changing CRMs is stressful, but importing data shouldn't have to be! By offering multiple options to move data into ServiceMonster, we want to help make that transition as smooth as possible.
Importing data into ServiceMonster helps to save you time. Having your information in ServiceMonster gets you up and running quickly and also opens up opportunities to utilize client's account information and past invoice dates to start running marketing campaigns reaching out to past clients.
Integration with Google Calendar can bring over appointments from google calendar onto your ServiceMonster schedule, blocking that time off and allowing you to get started quickly with the system.
Jump to QuickBooks Online Import
Jump to CSV File Import (Jump To Account List, Jump To Product and Service List)
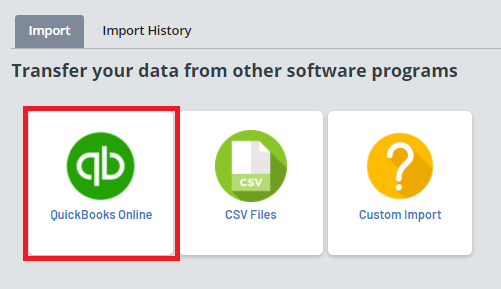
We offer three options when it comes to importing data, QuickBooks Online, CSV Files, and a Custom Import.
QuickBooks Online: QuickBooks Online is the easiest way to bring over Accounts, Invoices, Employees, Services, and More! If you are already using QuickBooks online or can easily bring your data into QuickBooks Online this will likely be the best move for you to get your data into ServiceMonster.
CSV Files: If you do not use QuickBooks Online or prefer to use a spreadsheet, you can create an account list and a Products and Services list to import as a CSV file.
Custom Import: If you use another field service system you can hire us to perform a custom import to get your data into ServiceMonster.

If you already use QuickBooks online you can easily import your client’s data into ServiceMonster.
From the Import page, select “Quickbooks Online”
If you have not already connected with QuickBooks Online, you will need to set up the connection.

Clicking “Connect” will open up a window where you can sign in to QuickBooks Online.
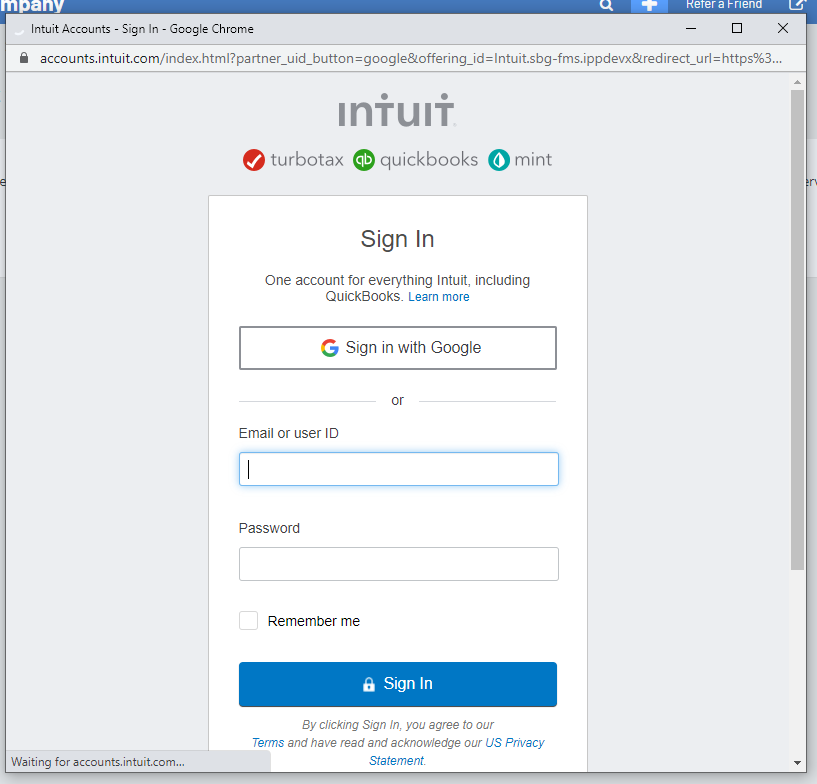
Sign in and connect with QuickBooks Online.
If you want, you can enter in a date that will limit the system to only pull information from after that date. Then click “Retrieve QuickBooks Data”
The data should now be imported into your ServiceMonster system.
Your first step to uploading a CSV file is creating the file. You can create these for both importing the Account List as well as your Products and Services list.
If you are uploading your account list we have a premade CSV file you can use to import your accounts.
Click here to download an excel sheet that already has all the possible import fields included.
Once you have the template, simply fill out each row with the client information. Each column will designate a specific field, so just ensure the data you are filling in matches the column. Keep in mind, some fields require specific formatting, so check the "import fields" section below.
Also note: you do not need to use every field, so if you don't have it all don't fret. At minimum we recommend including First and Last Name, Company Name (if applicable), Phone Number, Email Address, and Primary Site Address information.
Obviously, the more information you are able to bring over the smoother the transition, but with the minimum recommendation you have enough to know the client's name, location, and contact information.
Active: True or False, True if they are an active account, False if not.
Salutation: Title for the client on the account, Mr., Miss, Ms.
First Name: The first name of the client associated with the account.
Last Name: The last name of the client associated with the account.
Company Name: The name of the company associated with this account.
Commercial: True or False. True if the account is a commercial account, false if they are a residential account.
Account Type: Prospect or Customer
Account Sub Type: Add in the subtype for the account. Essentially a tagging system to categorize your accounts differently for marketing or follow up purposes. Common examples include Property Management, Realtors, Retail, Restaurant, VIP, Etc.
Acquisition Date: The date you started working with this client, formatted as MM/DD/YYYY
Phone1: The client’s first phone number.
Phone2: The client’s second phone number.
Phone3: The client’s third phone number.
Fax: Client’s faxing number.
Email: Client’s email address.
Payment Terms: The payment terms for orders on this client's account, choose from "Due Upon Receipt", "Net 15", "Net 30", or "Net 60".
Memo: The account memo which you can see at the top of the accounts page, you can add up to 2048 characters.
Reference: Can be used for short, common note or field when a custom field is less desired. This field is searchable. The account reference field limited to 128 characters.
Lead source: The lead source for the account, so how they found out about your business.
Address1: Line 1 of the primary site address for this account. (Street address)
Address2: Line 2 of the primary site address for this account. (Apt/Suite #, etc)
City: City of the primary site address for this account.
County: County of the primary site address for this account.
Country: Country of the primary site address for this account.
State: State of the primary site address for this account.
Zip: Zip code of the primary site address for this account.
Alert: True or False, True if there should be an alert on this account, false if not.
Phone 1 label: Choose between Mobile, Home, Or Work so you know what type of phone the Phone1 number will be reaching.
Phone 2 Label: Choose between Mobile, Home, Or Work so you know what type of phone the Phone2 number will be reaching.
Phone 3 Label: Choose between Mobile, Home, Or Work so you know what type of phone the Phone3 number will be reaching.
Do No Mail: True or False, set these as true if the client has requested to not receive marketing notices from you via that contact method.
Do Not Call: True or False, set these as true if the client has requested to not receive marketing notices from you via that contact method.
Do Not Email: True or False, set these as true if the client has requested to not receive marketing notices from you via that contact method.
Last Invoice Amt: The total for the last invoice you have for this account. Having this information is helpful to begin client retention marketing right away based on the amount charged for previous work done.
Last Invoice Date: The last day you did work with this client. Formatted as MM/DD/YYYY. Having this information is helpful to begin client retention marketing right away based on the last date of previous work done.
Site Reference: Additional site field that you can use for just about anything.
Site Note: Place to store site specific notes such as gate codes, driving instructions, equipment needs, ect.
2nd Site Name: Optional field if you wish to name the site. Will default to the street address if blank
2nd Site Address1: The first address link for the second site. (Street address)
2nd Site Address2: The second address line for the second site. (Apt/Suite #, etc)
2nd Site City: The city for the second site on this account.
2nd Site Zip: The zipcode for the second site on this account.
2nd Site County: The county for the second site on this account.
2nd Site Country: The country for the second site on this account.
2nd Site Contact: The name of the contact person for the second site on this account.
2nd Site Phone1: The phone number for the second site on this account.
If you are uploading your price list we have a premade CSV file you can use to import your products and services.
Click here to download an excel sheet that already has all the possible import fields included.
Once you have the template, simply fill out each row with the product and service information. Each column will designate a specific field, so just ensure the data you are filling in matches the column.
Keep in mind, some fields require specific formatting, so check the "import fields" section below.
Not every field is required, at minimum just the product or service name is required. We also recommend including the description and price information to get it ready to use on orders.
ServiceName: The name of the product or service as you would like it to appear on order forms. (The ServiceName column in the products and services.csv file should be mapped to the ServiceMonster Name column since the two columns have different names and the auto-mapping doesn't work.)
Quick Code: Here you can enter a code that you can search for this product with.
Description: Add a description for the product or service, this can also appear on order forms.
Price: The price for the product or service.
Quantity: The preset quantity for this product or service.
Group: You can enter a group name here if you want to group your products and services.
Unit: What type of unit this product or service is priced at (Example, Sq. Ft)
Taxed (True=Yes, False=No): If this product or service is taxed, write “True”, if this product or service is not taxed write “False”.
Commissionable (True=Yes, False=NO): If this product or service is commissionable write “True”, if not write “False”.
Type (Service or Product): Label if this is a product or service.
Upsale (True=Yes, False=NO): If this product or service should be automatically marked as an upsale write “True”, if not write “False”.
Active (True=Yes, False=NO): If this is a product or service you currently offer, write “True” if not write “False”.
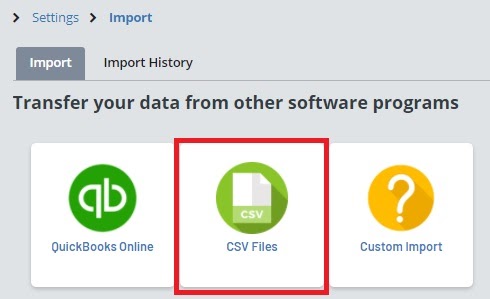
To upload the files you have created, click on Data Import in Settings and select “CSV Files”.
Pick if you want to import “Accounts” and “Products & Services”.
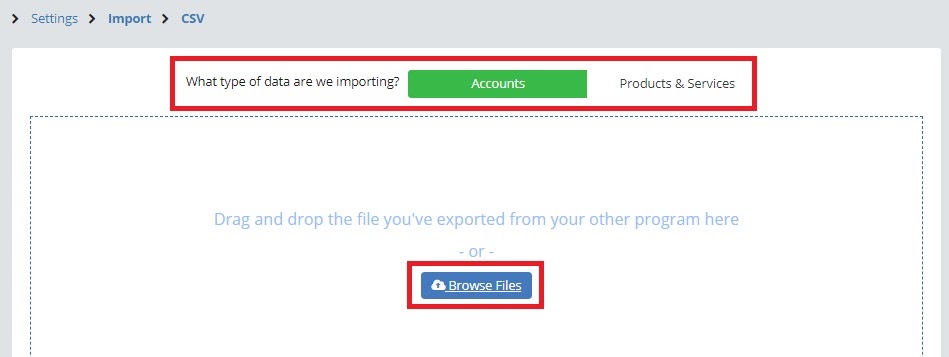
Then click “Browse Files” to select the file you want to upload.
Once a file is selected, this will take you to the Field Mapping Page. Here you can double check that the fields you entered information into are being categorized correctly.
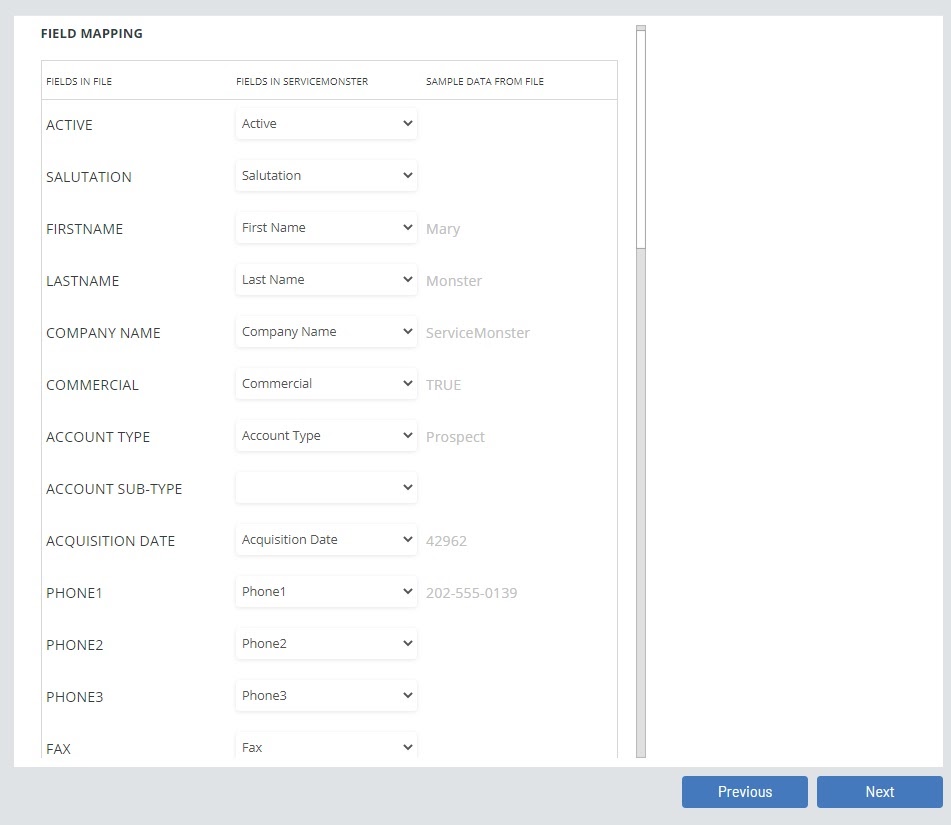
Go through and double check that everything is categorized correctly. Then click “Next” to view a preview of your data, if that looks correct click “Next” again.
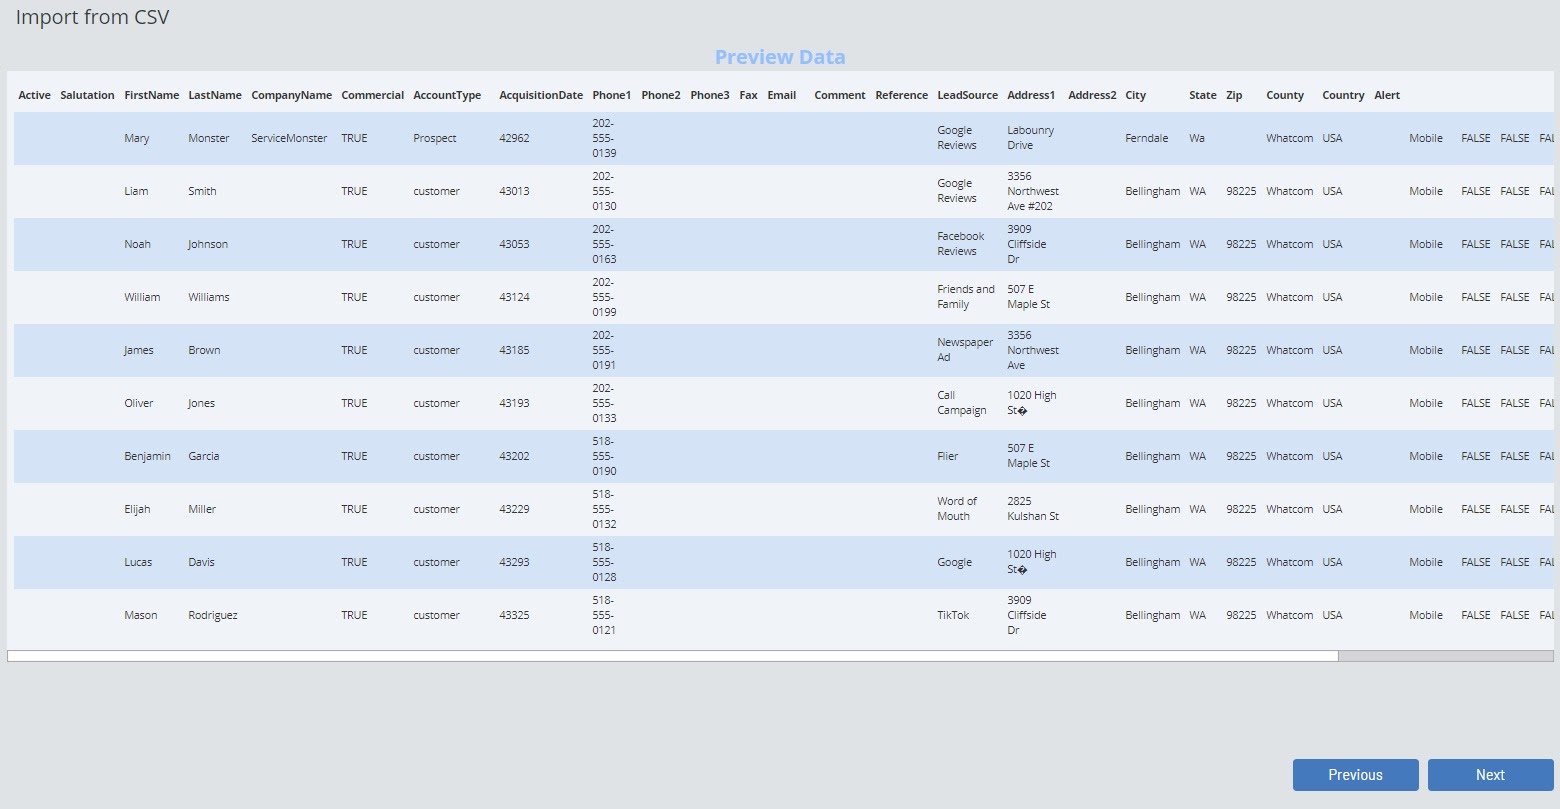
The import will begin, you will have the option to cancel the import from here. Otherwise you will need to wait until the import is completed. The system will let you know once the import is complete.
Hire us to perform a custom import from other field service systems.
Contact us at Support@servicemonster.net to learn more.
Integration with Google Calendar allows you to import your schedule into ServiceMonster so you can get started with the system with your schedule already set up! Follow this link to learn how to set up google calendar integration.

