Appointments, in ServiceMonster, are the times you schedule to work on a client's order. Appointments require an order (Estimate, Work Order, or Invoice) and will appear on the schedule as Appointment Cards.
There are many places to create an appointment from: the Order Page, the Quick Add, and directly on the Schedule.
To schedule an appointment from an Order Page (Estimate, Work Order, or Invoice), simply click on the "Schedule" button in the menu bar.

This will take you to the Schedule, with your appointment showing up in the "On-Deck" box.
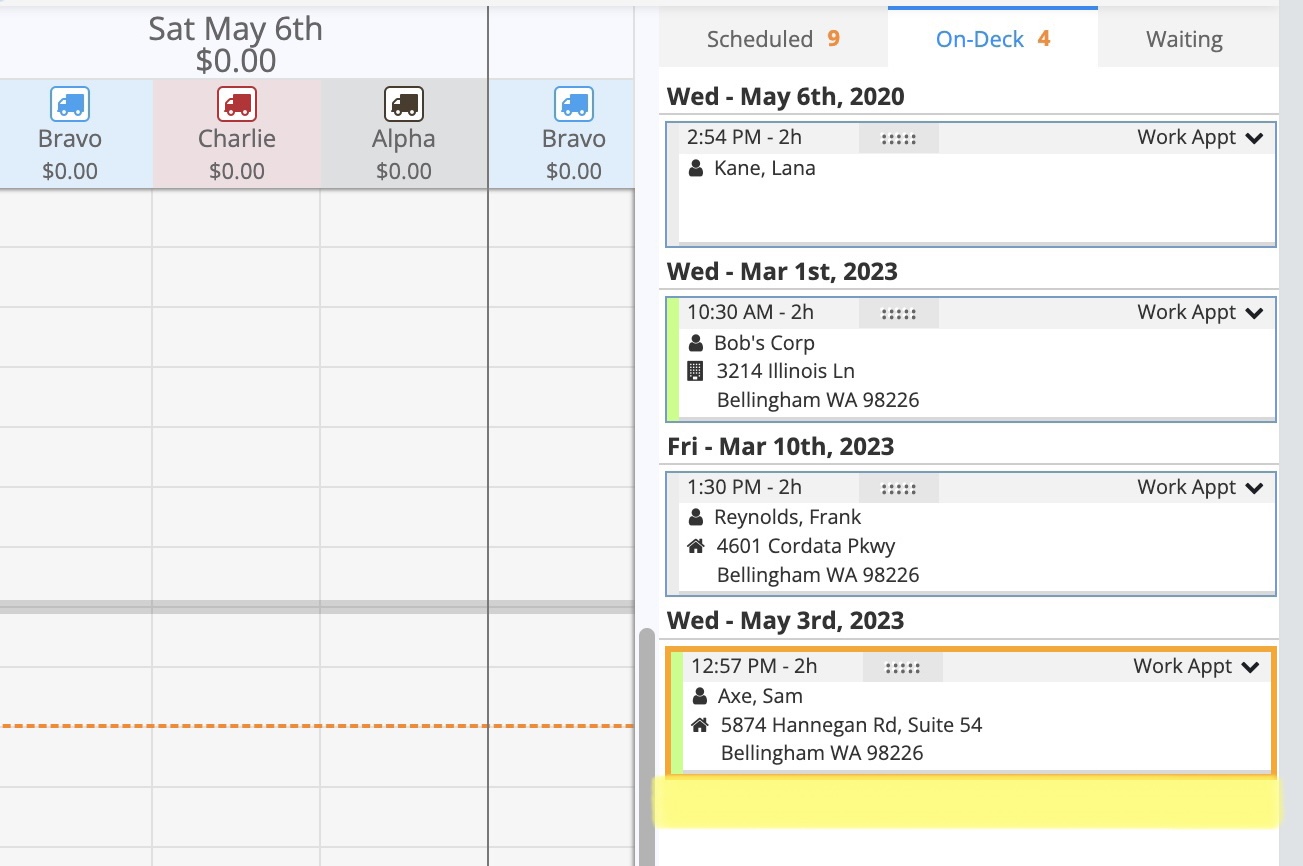
To add it to the Schedule, simply drag and drop the appointment from On-Deck onto the schedule. You can drag the appointment by clicking on the dotted grab area.
.png)
Your appointment is now created!
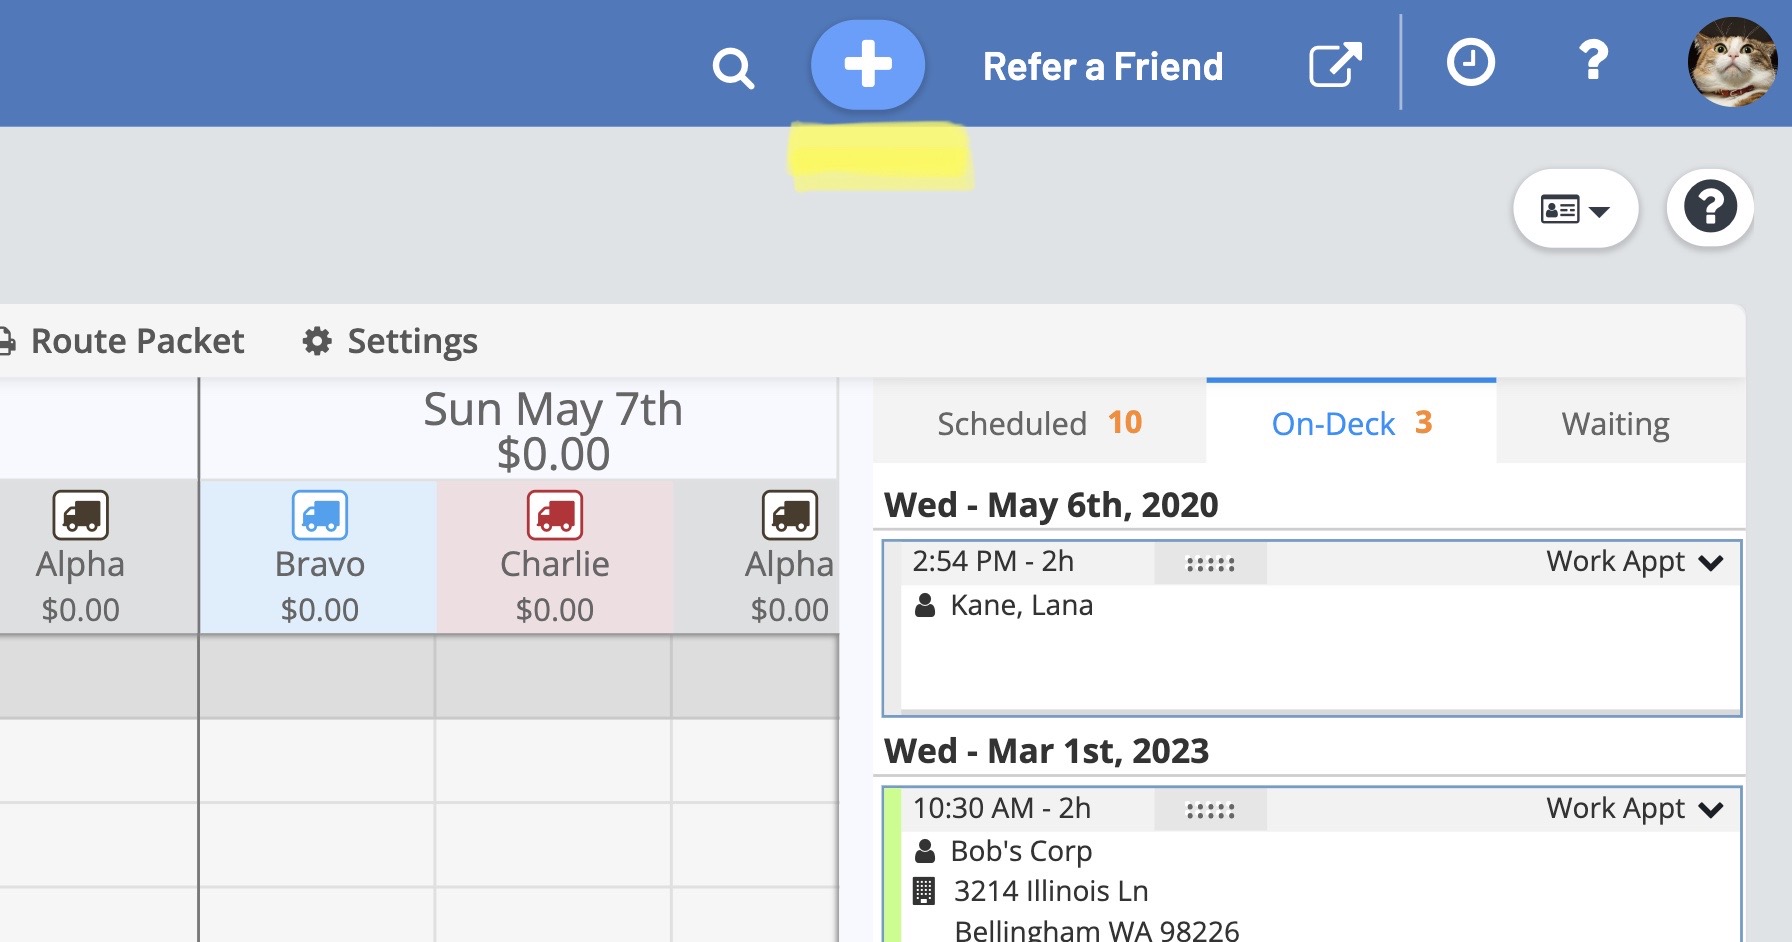
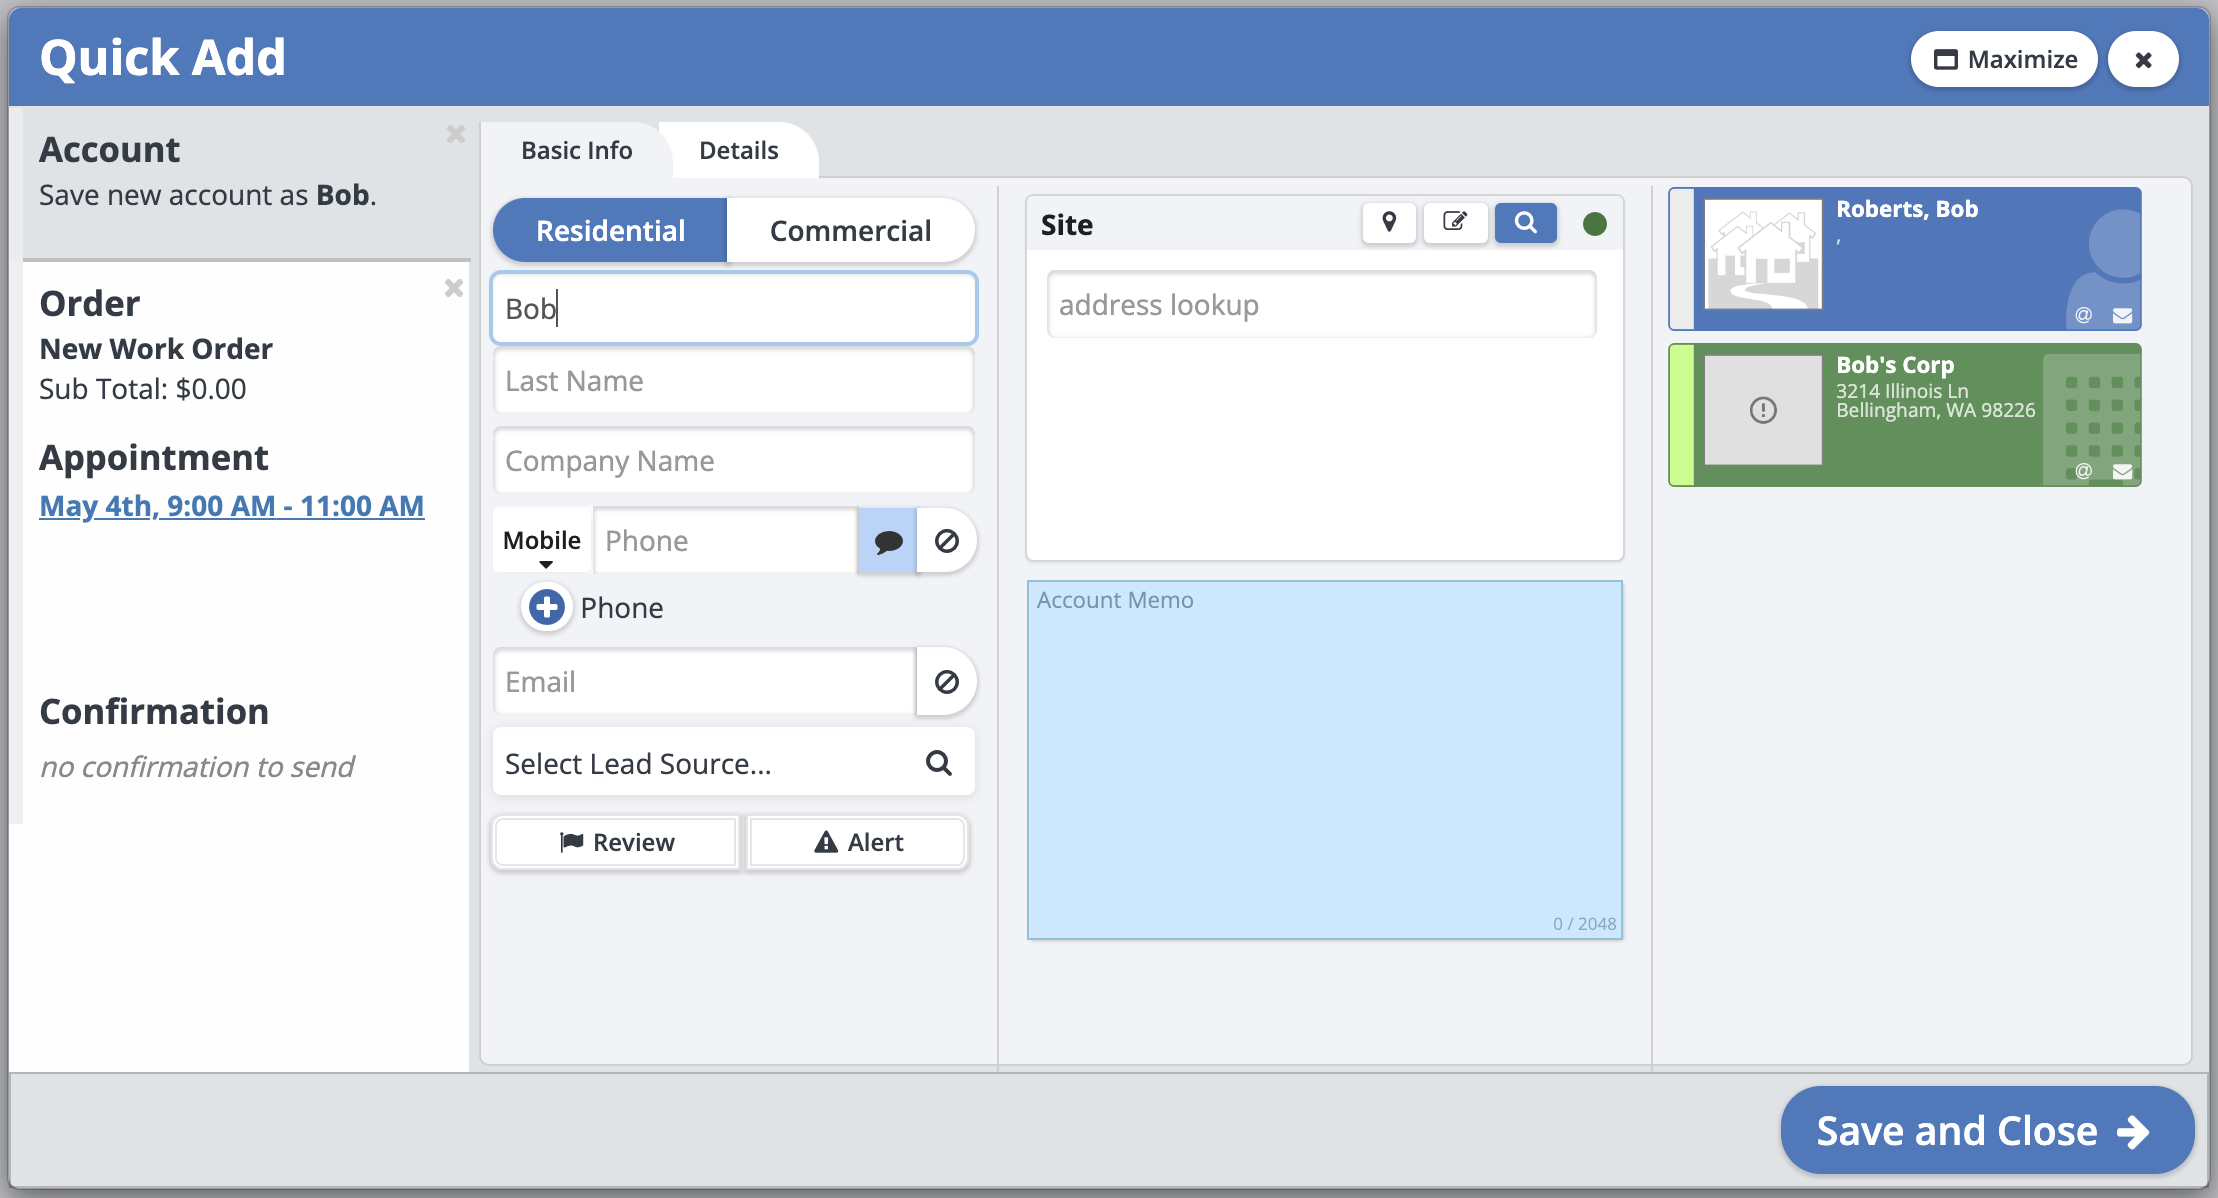
From the Quick Add, you can easily create a new account, order, and schedule an appointment. You can open the Quick Add from anywhere on the site by clicking on the blue "+" button at the top of the screen.
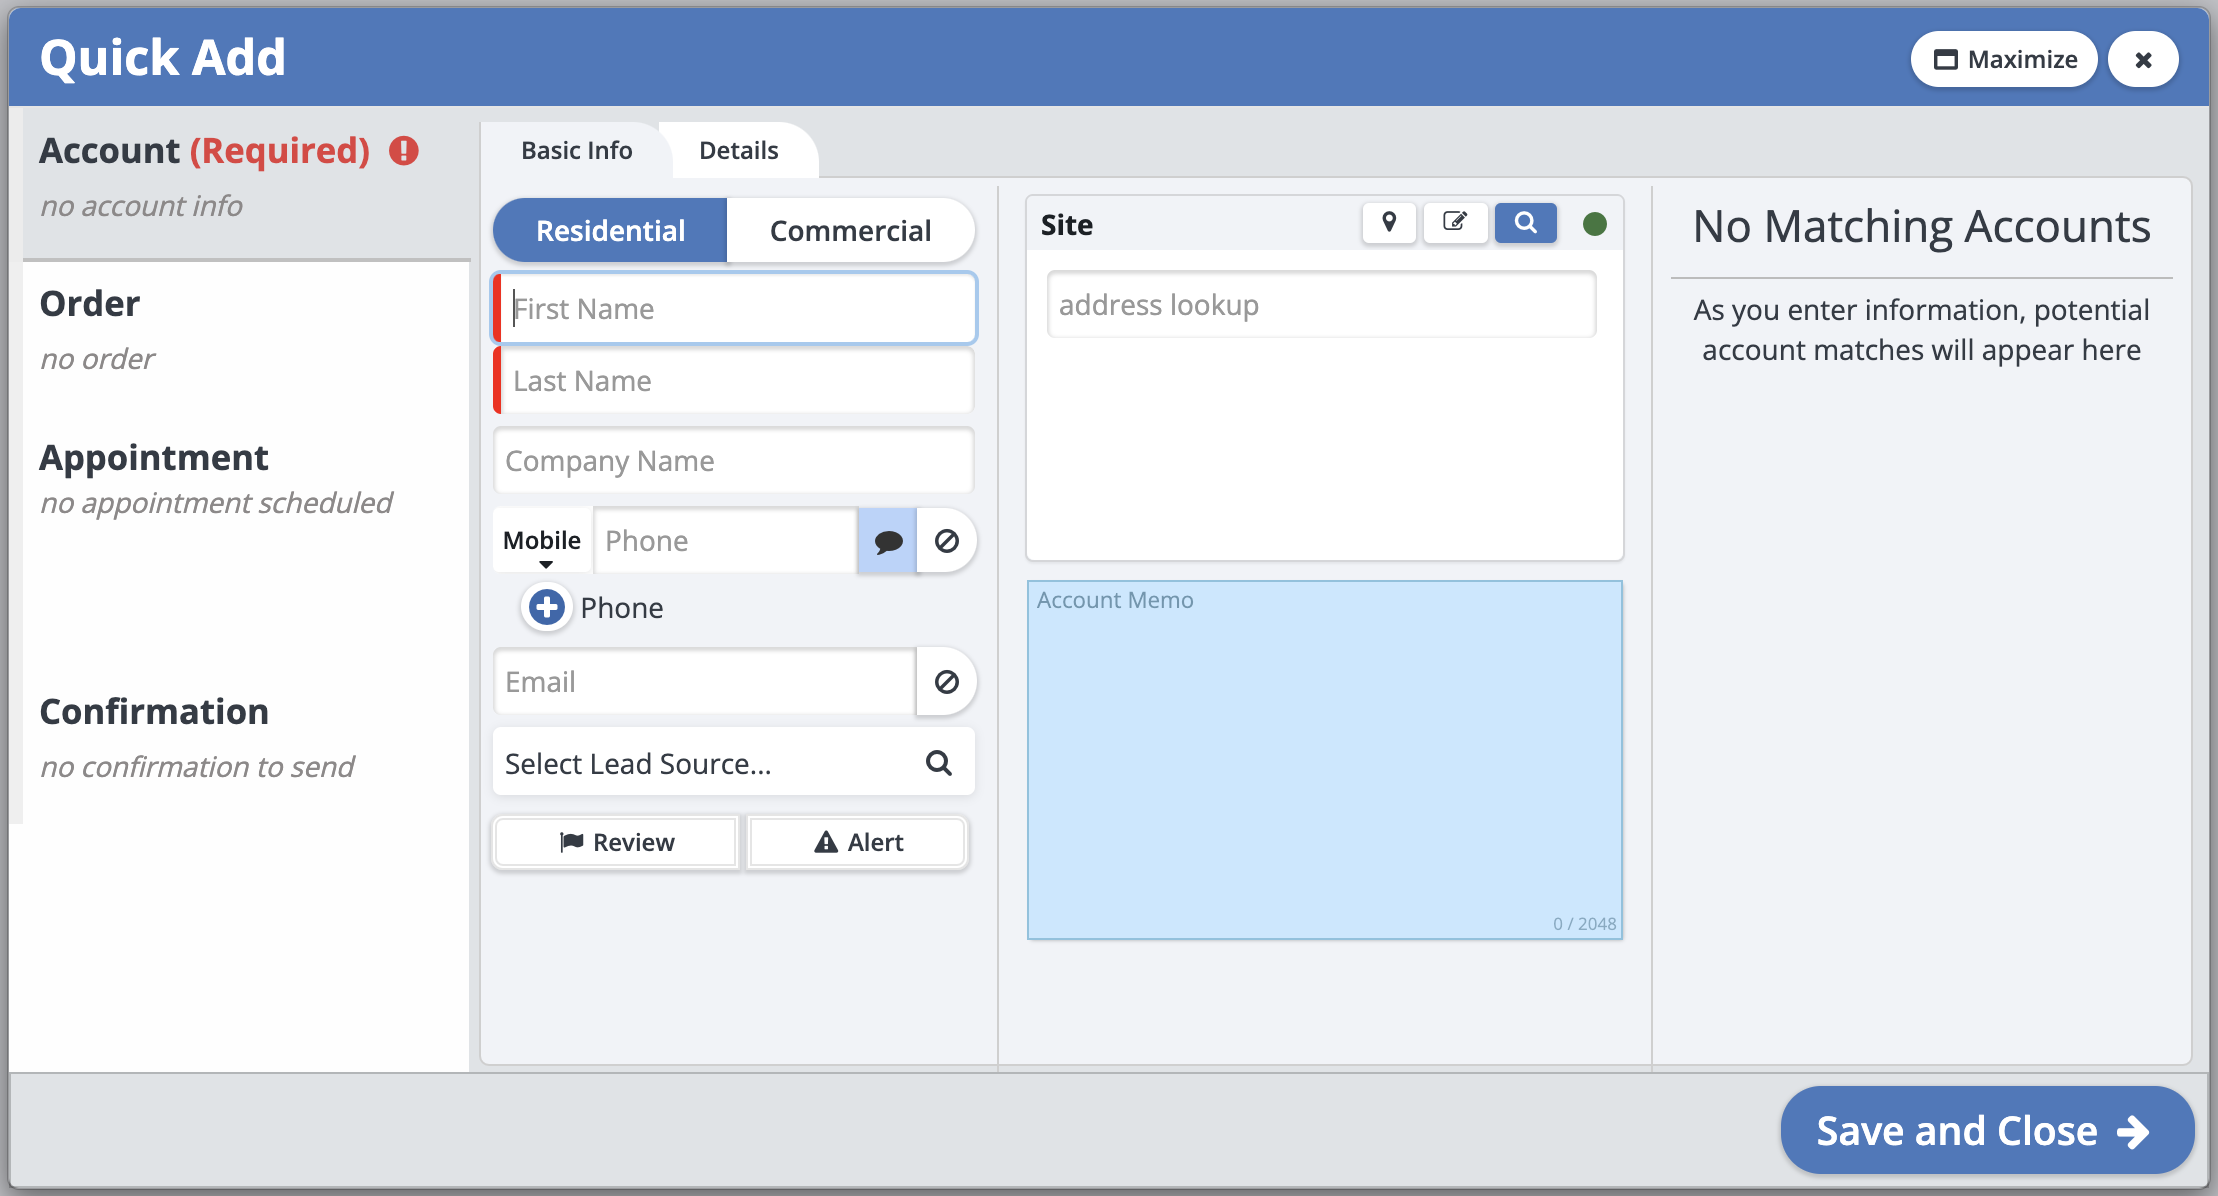
First, you will need to create an account by filling in the information, or choose an account from the matches that show when you start to type in a name.
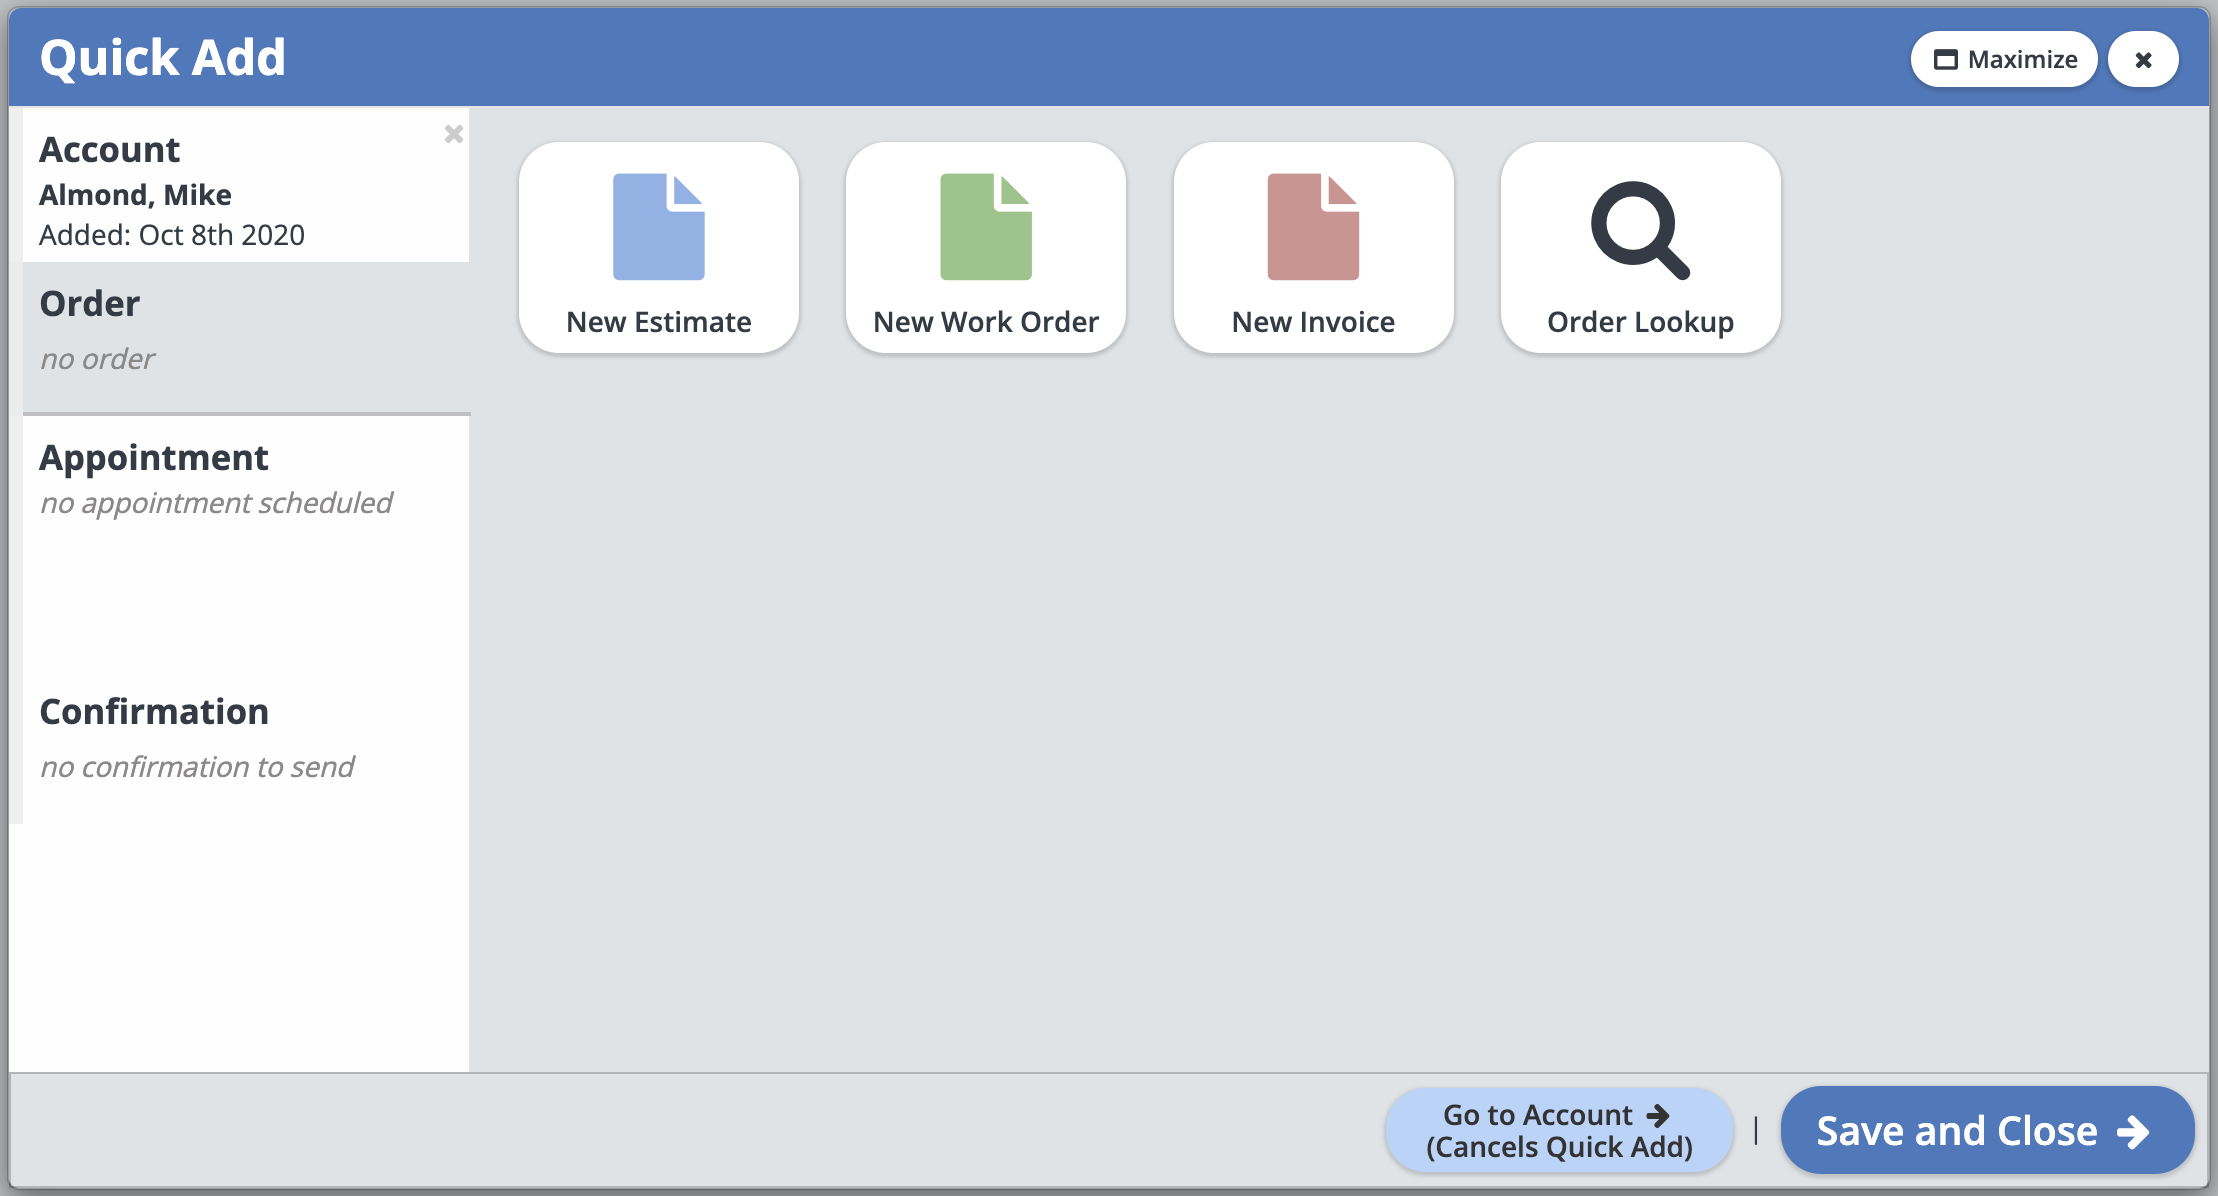
Then create or choose your order from the "Order" tab.
Then go to the "Appointment" tab and simply click anywhere on the schedule to add your appointment.
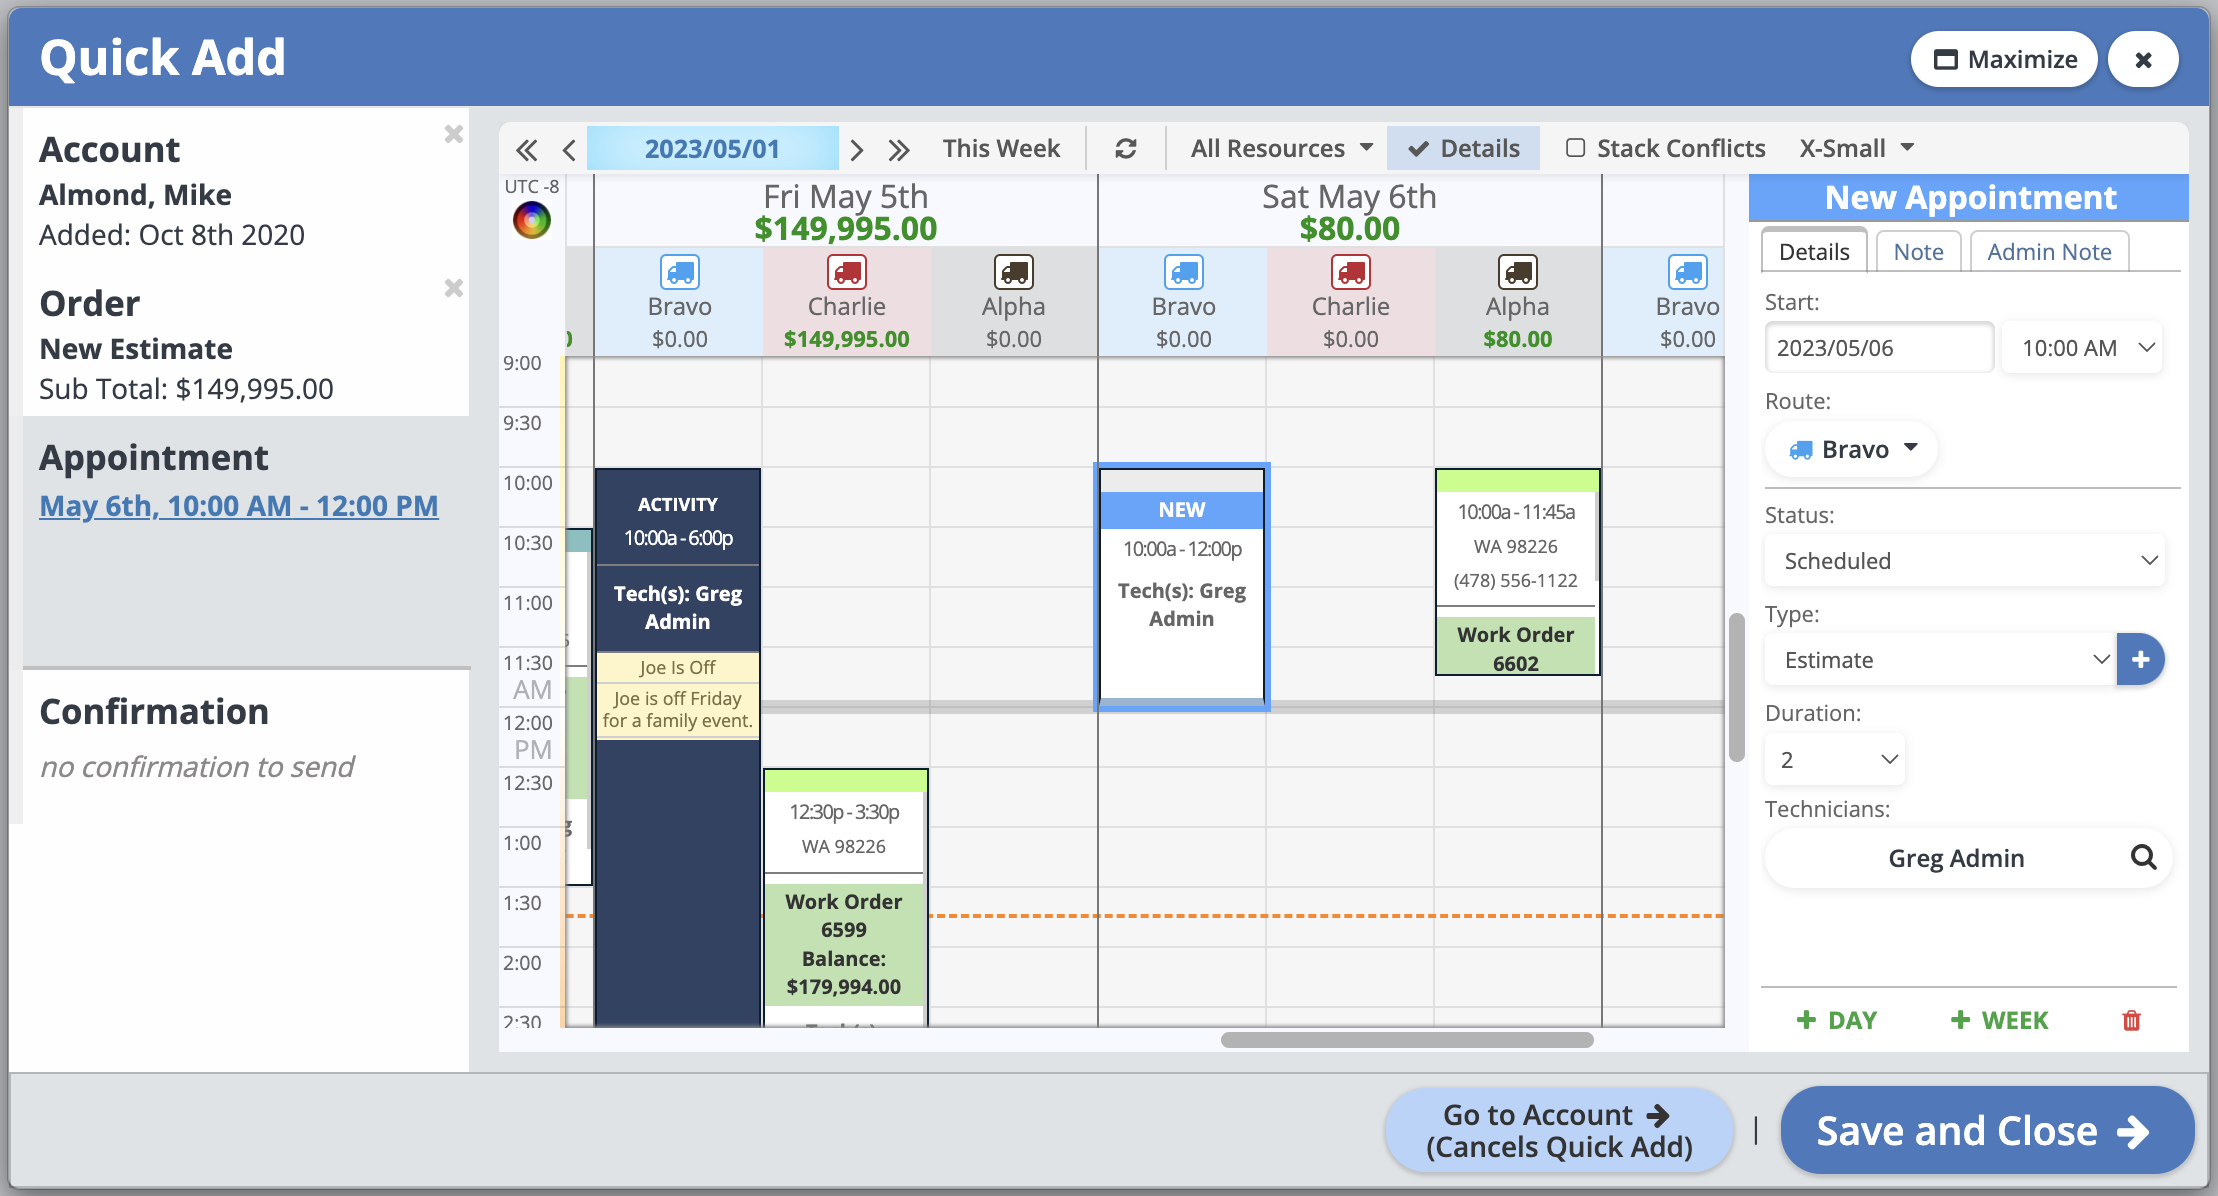
The "New Appointment" box will appear on the right, where you can add in and adjust the following information:
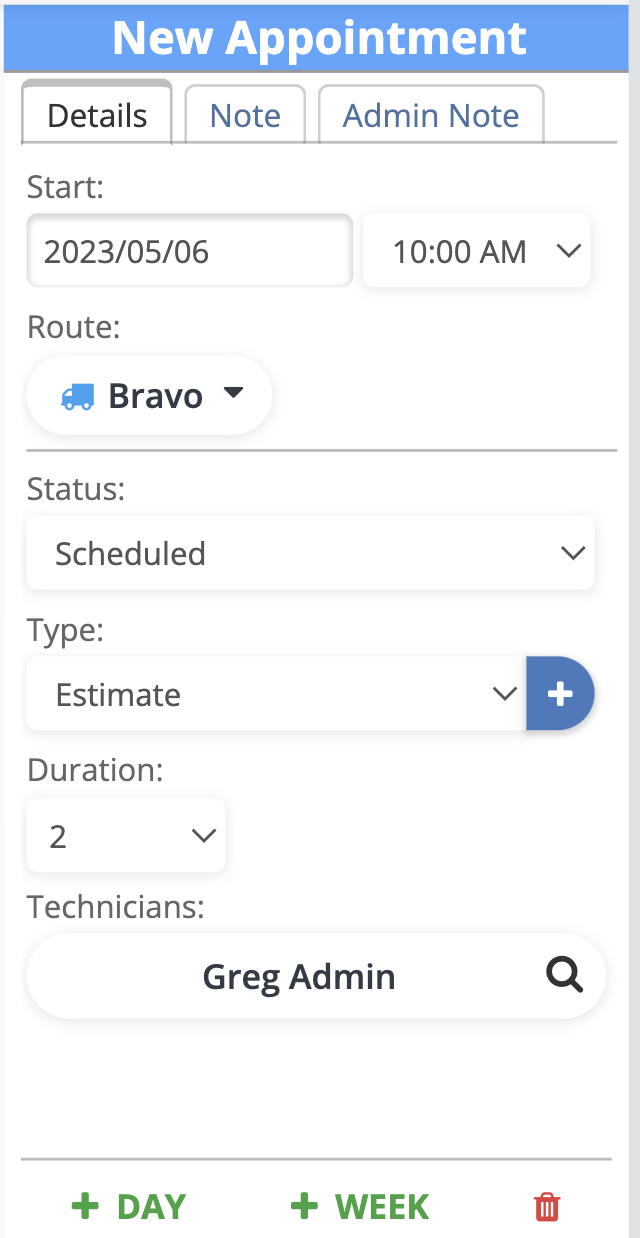
Details: In the details tab you can adjust the details for the appointment.
Note: In the note tab you can add in notes that only your technicians will be able to see. This is a great spot to add in the information they need to do the job, such as a gate code. They will be able to see these notes on the mobile app, or in route packets.
Admin Note: In the admin note tab you can add in notes that only users who have the Admin security role can see.
Start Date/Time: Here you can view and adjust the start date and time of the appointment.
Route: Here you can see what route this appointment is assigned to.
Status: Here you can choose the status of the appointment, it will automatically set to being Scheduled, but your other options are: Scheduled, Confirmed, On The Job, Completed, or Canceled.
Type: Here you can choose the type of appointment, this will automatically set to be "Work", but some other options include: Bid, Estimate, Rework, Pick-up, and Drop-off. You can also create your own options by clicking on the blue "+", then typing in your option, then clicking on the green checkmark button that will appear. If you order is in the Estimate state, the appointment type will automatically be set to "Estimate".
Duration: Here you can adjust how long the appointment duration will be.
Technicians: Here you can see what technicians are assigned to this appointment. You can edit this by clicking on the word "Technicians" and clicking on the techs you want to include.
+DAY: Clicking here adds another appointment the very next day as the one selected at the same time and on the same route.
+WEEK: Clicking here adds another appointment in the very next week as the one selected at the same time and on the same route.
Trash: You can click on the red trash can icon to delete the selected appointment.
From the Schedule, you can create a new appointment by clicking directly on the schedule where and when you want your appointment to be.
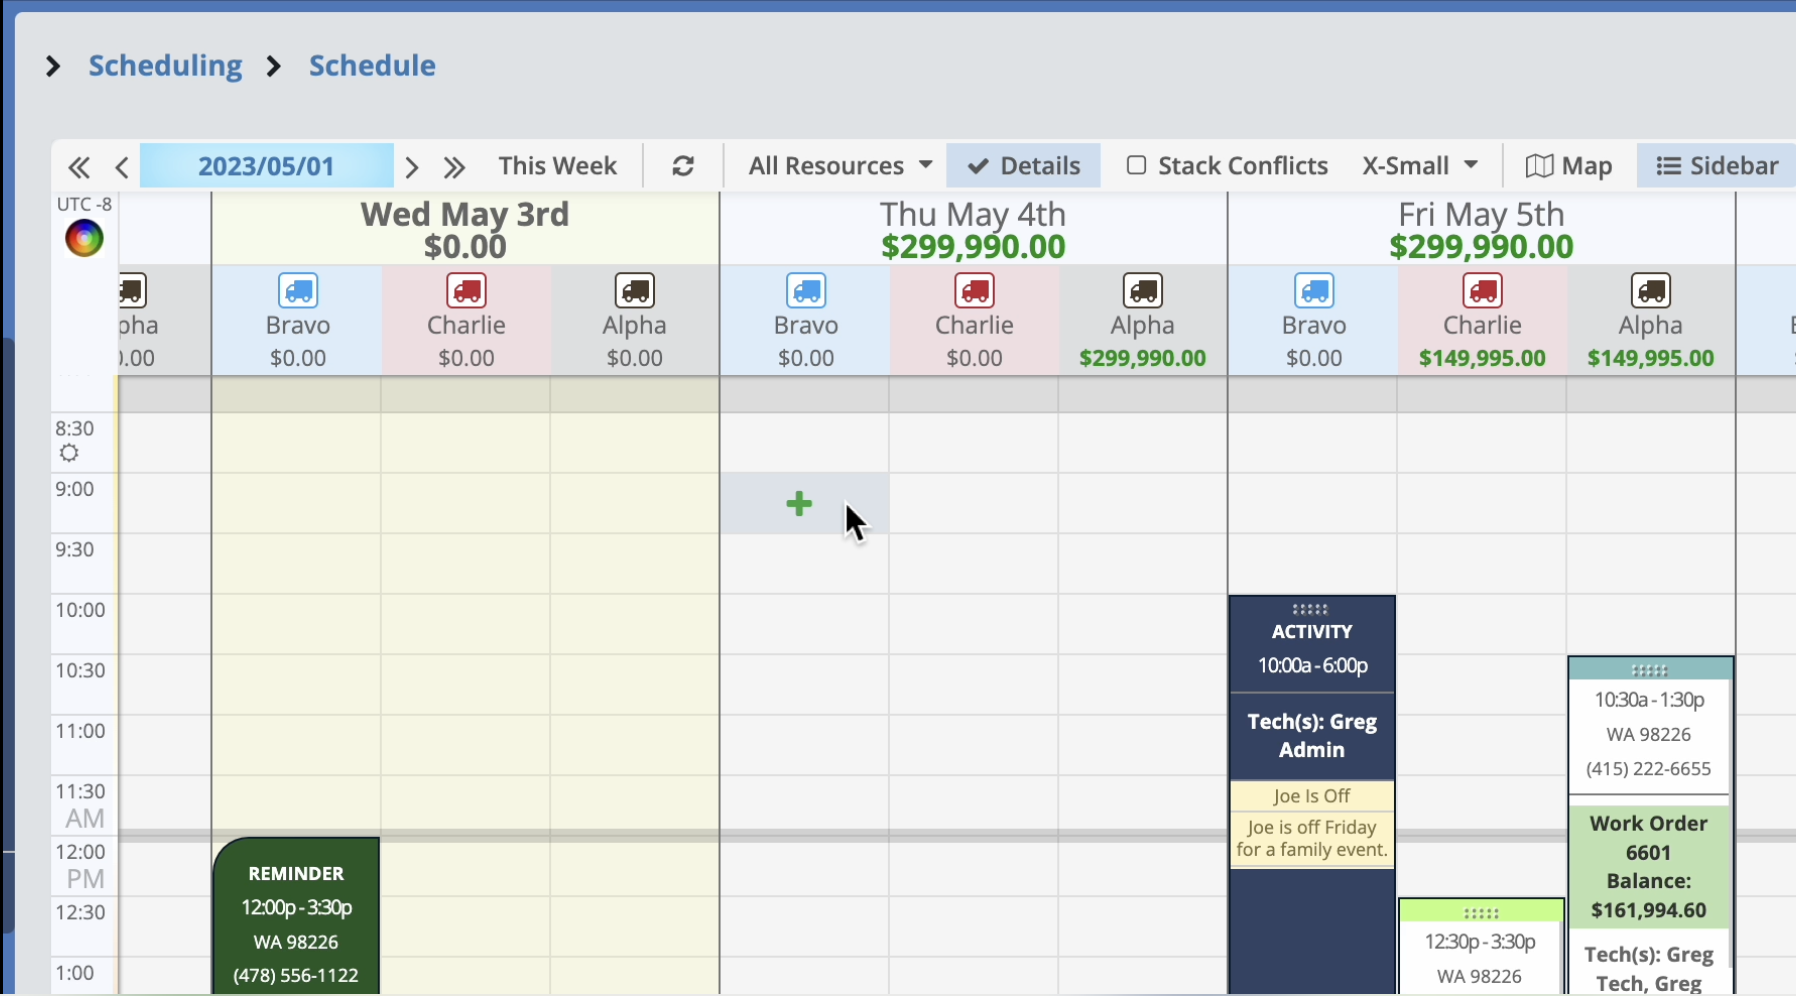
Then the Quick Add will open up with the appointment already created, so simply create or add the account and order information.
Remember to click "Save" when you are finished!

