An order is an Estimate, Work Order, or Invoice in the ServiceMonster system.
Estimates, always color-coded blue, are the talking step of your process, creating an Estimate is great for clients who are calling around for prices or aren't set yet on doing business with you. If you prepare an Estimate, you will have a record of the prices you offer them and can keep track of your Estimates list, easily contacting those you haven't heard from yet to turn it into a Work Order and get that work scheduled.
Work Orders, always color-coded green, are the working step of your process. This is when you will schedule an appointment to go out and do the work.
Invoices, always color-coded pink, are the payment step of your process. When they work is done you can turn your work order into an invoice and collect payment to finish the order.
Making an Order from the Account Page, Home Page, Or Order List
Making an Order on the Quick Add
You can make a new order from the Home page, the Order List, an Account Page, and the Quick Add.
Creating an order from the Home page, Order List, and Account page will all take you to the new Order page.
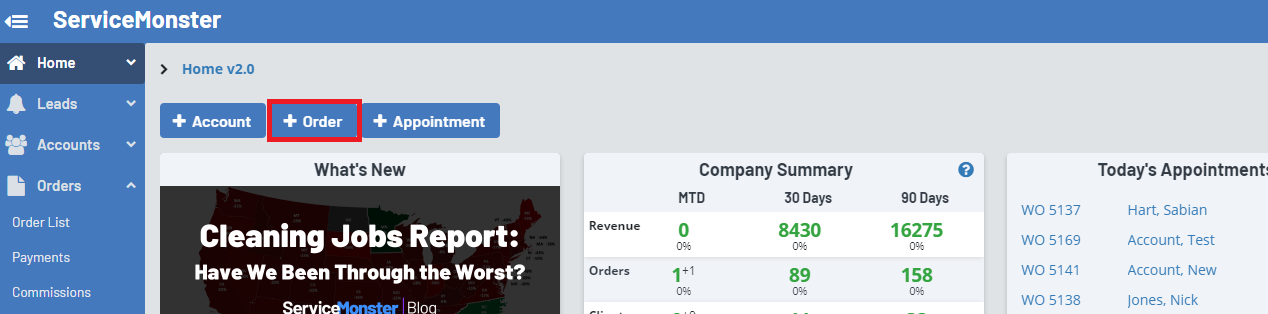
To make a new order from the Home Page, click on the "+ Order" button.
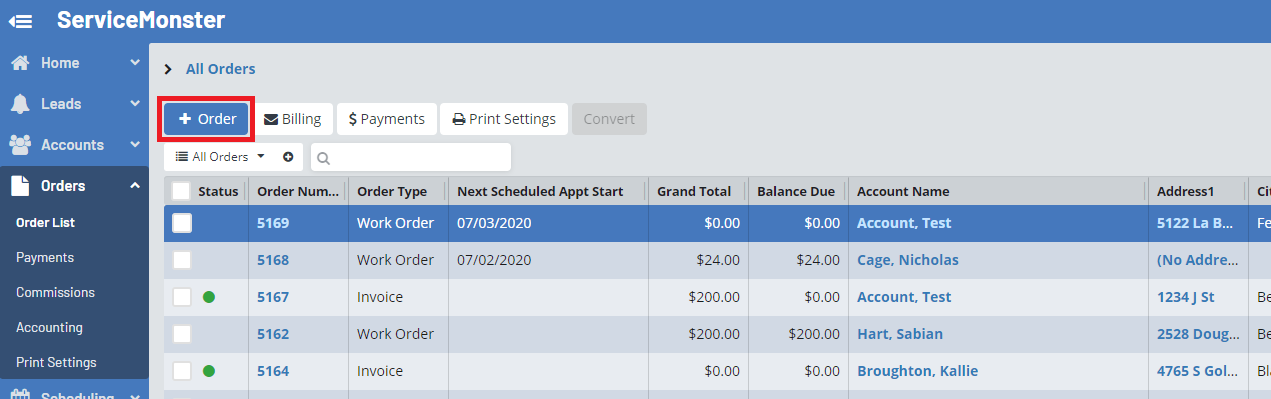
From the Order List, simply click on the "+ Order" button.
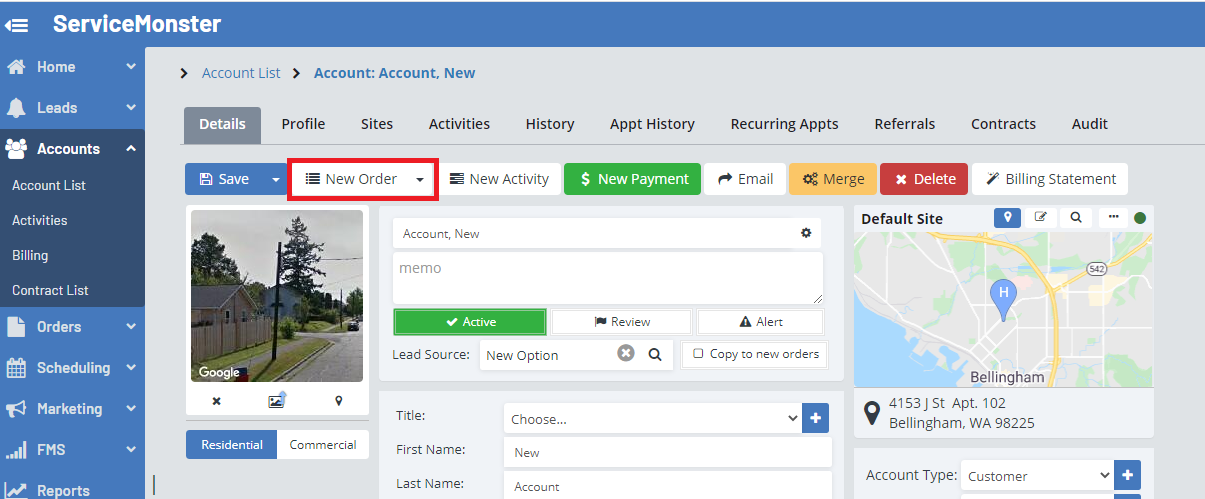
From an account page, you can click on the "New Order" button.
If you use the Home page, Order List, or Account Page, you will be taken to the Order Detail page.
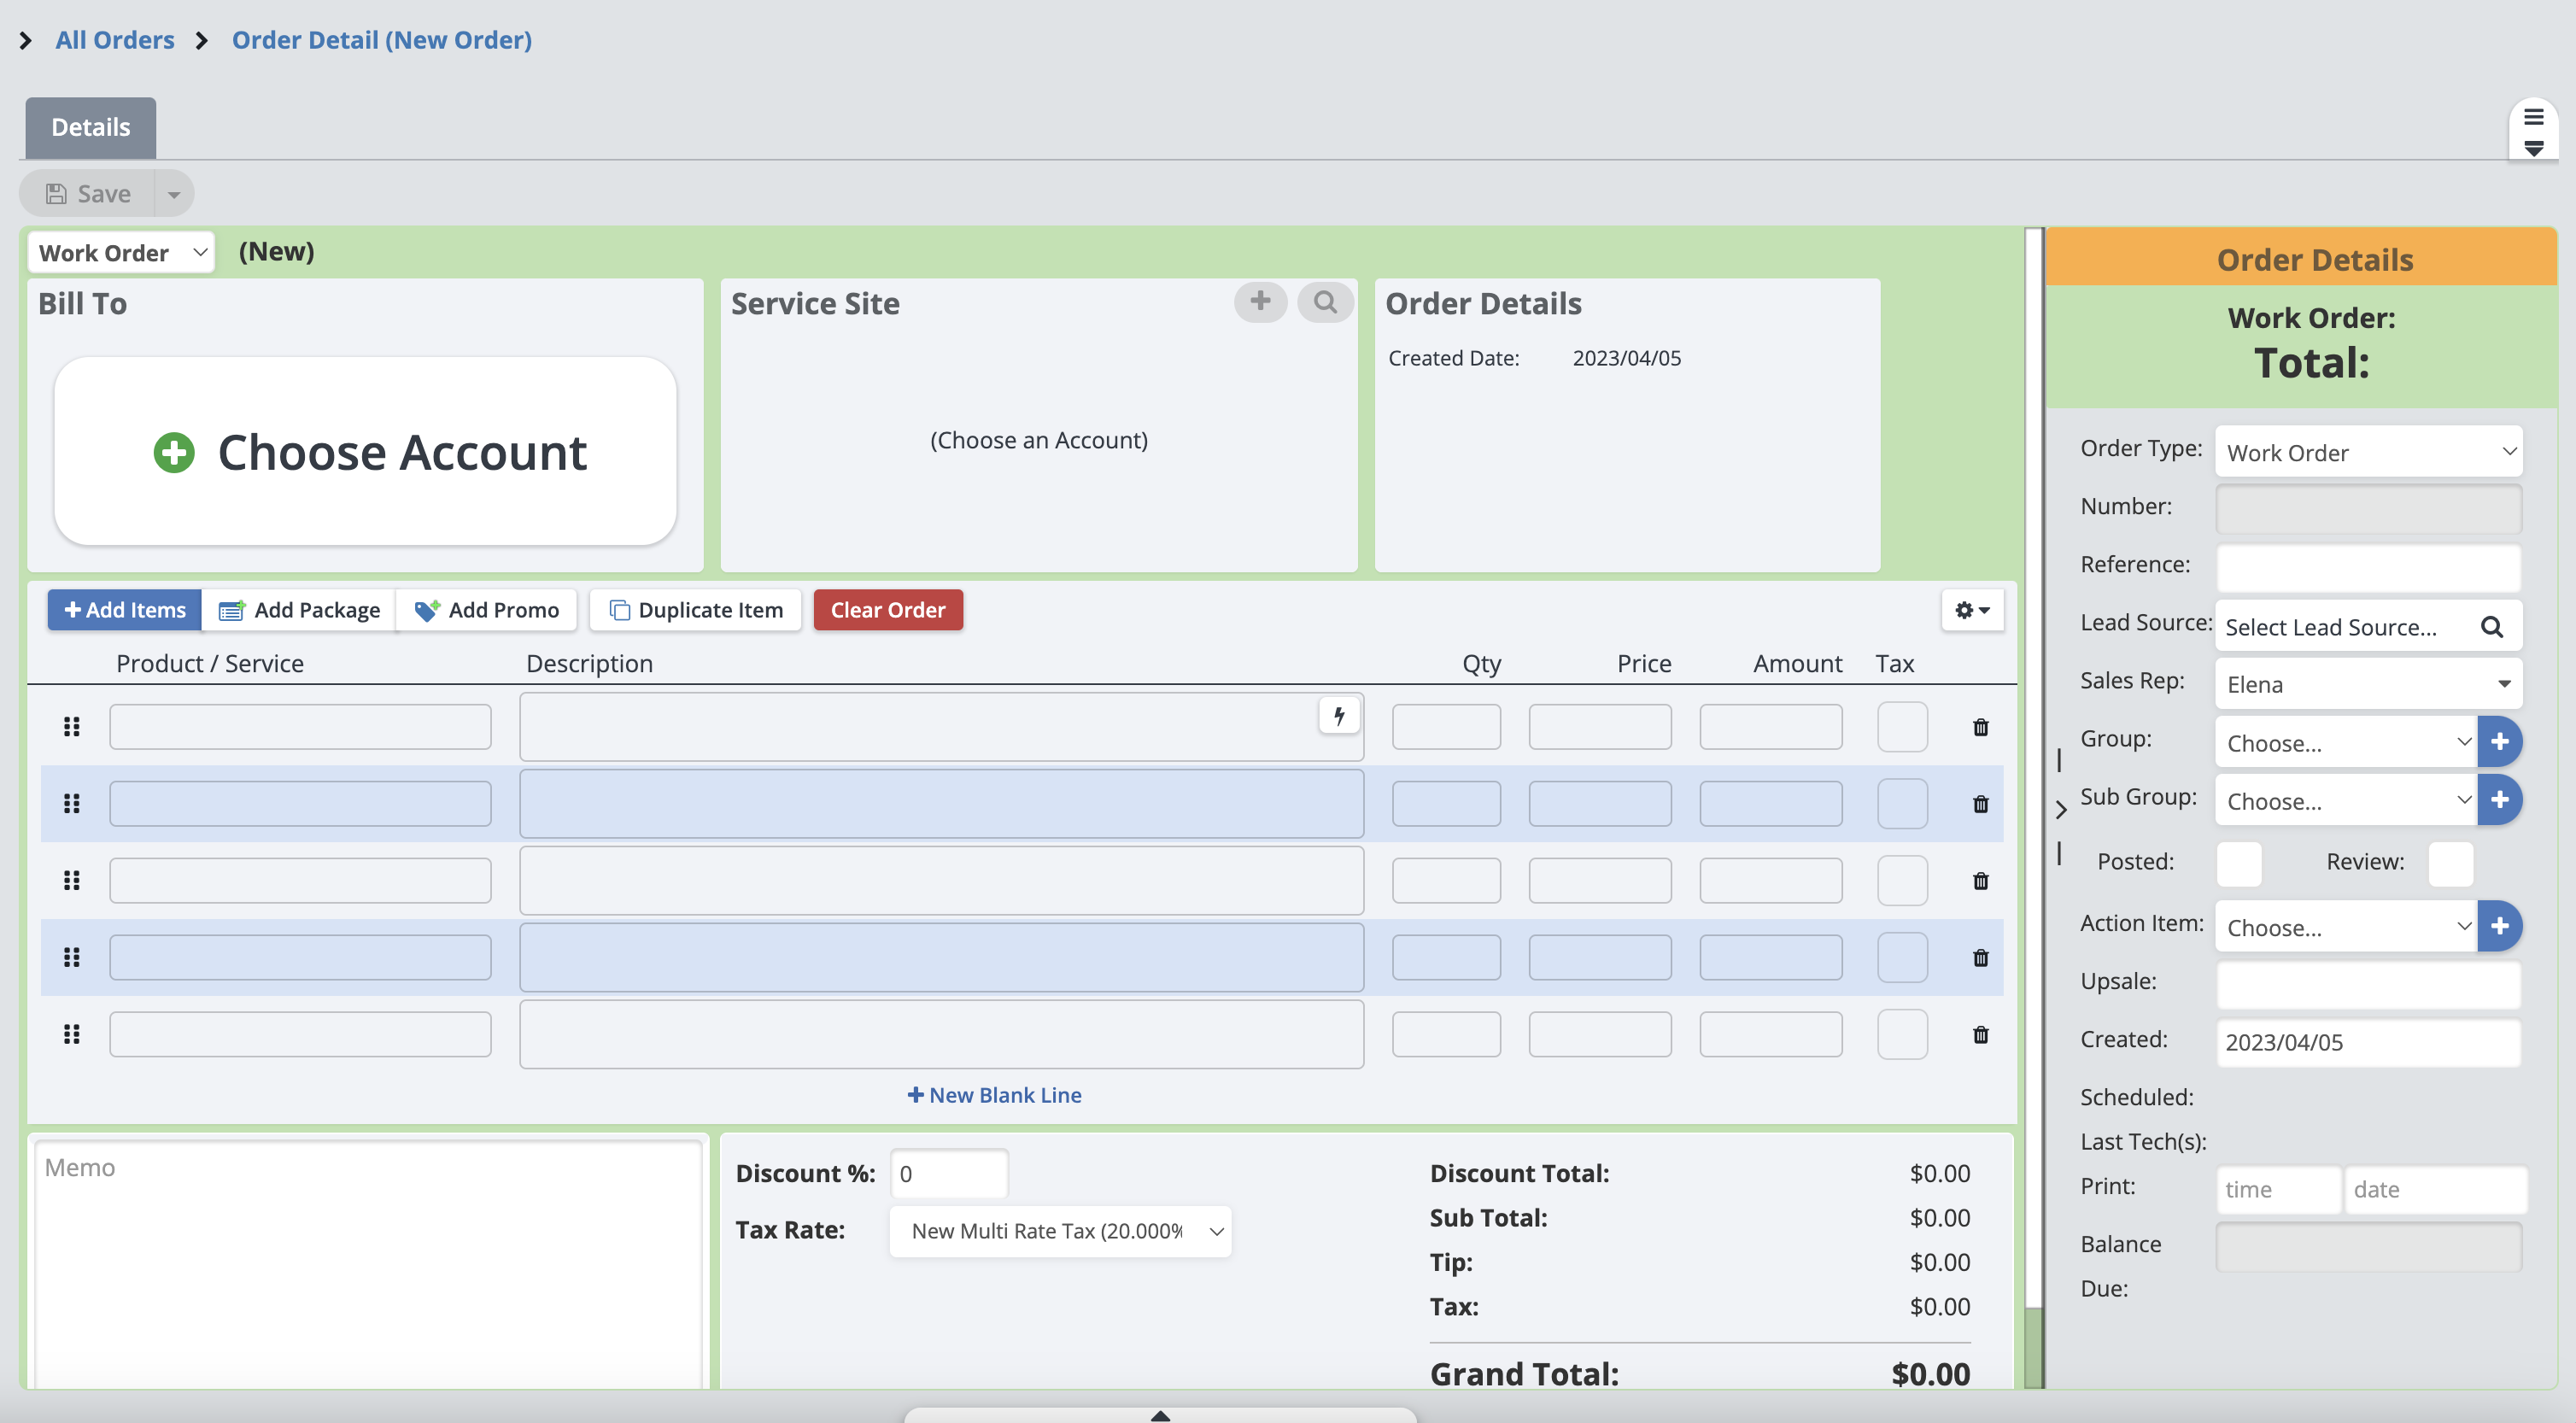
Unless you have created the order from the Account Page, you will need to choose the account that the order is for.
Choose Order Type: In the drop-down menu in the top left corner, you can select what type of order you are creating, either an Estimate, Work Order, or Invoice.
Choose Account: Pick the account this order is for, or make a new account.
Service Site: This will auto-populate with the primary site for the account, but you can also choose another site for the account here.
Order Details: You will be able to see details about the order here.
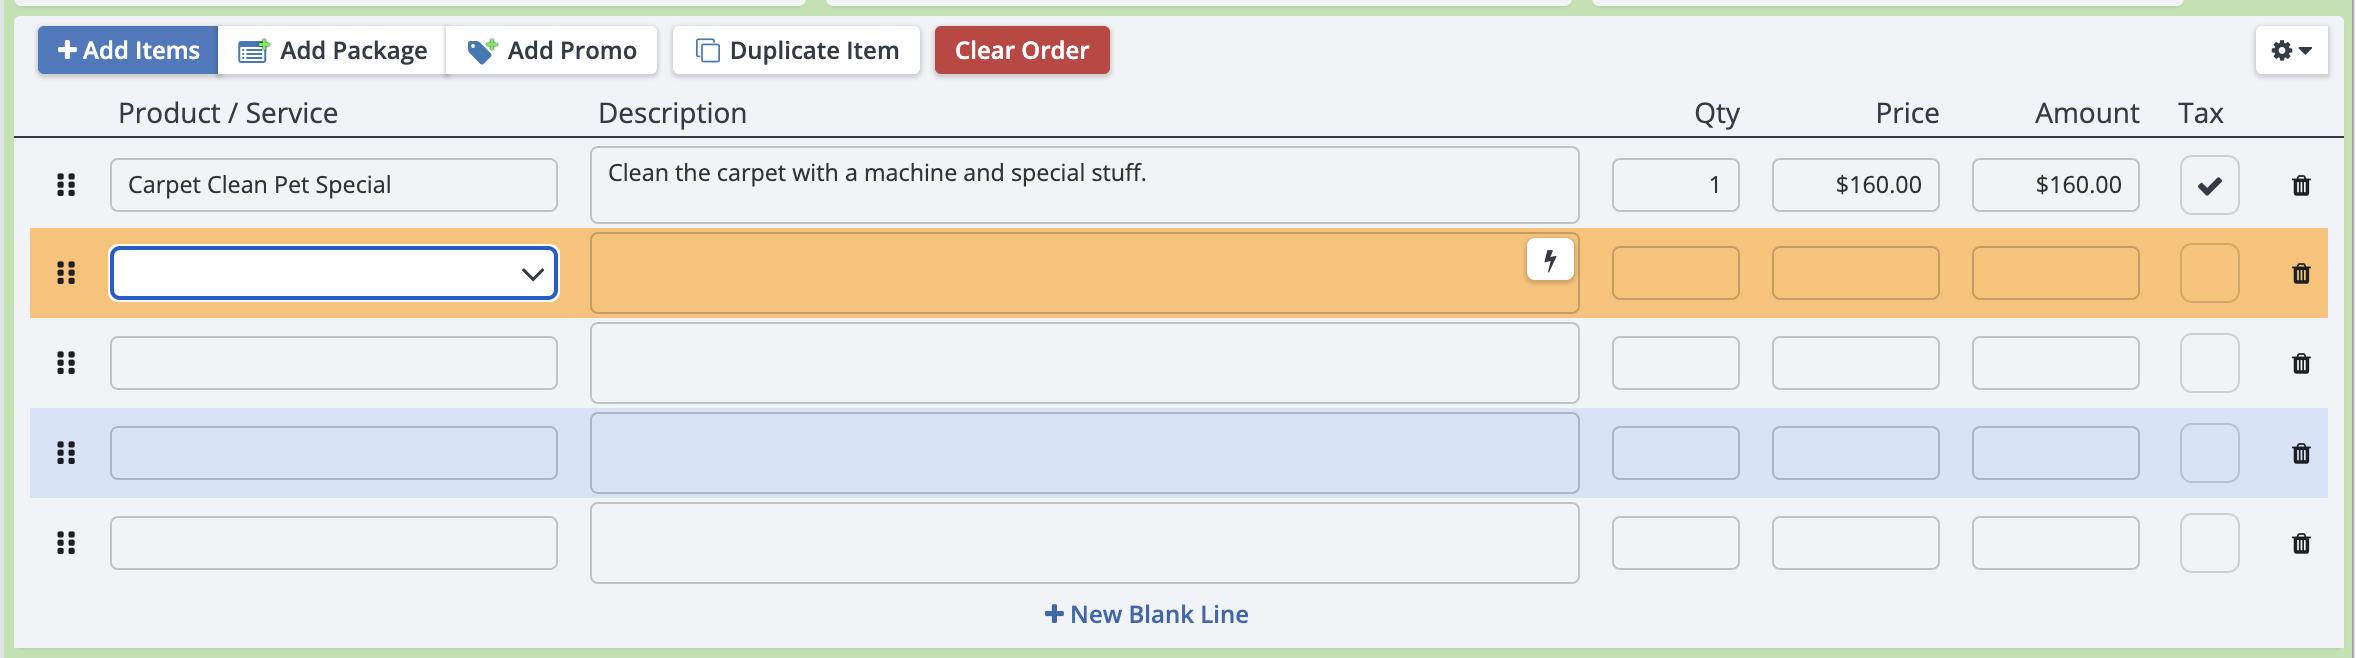
+ Add Items: Use this button to open the Bulk Add Items menu where you can easily see and select multiple line items.
Add Package: Use this button to add a package (You can create packages from the Packages page within Settings).
Add Promo: Use this button to add a promo (You can create Promos from the Promo page within Settings).
Duplicate Item: If you select a line item you can click this button to duplicate it.
Clear Order: This button removes all the line items from the order.
Line Items for Products and Services: In the line items rows, you can build your order by clicking into the input text field in the "Product/Service" column to search for and select existing products or services you want to use or quickly create new ones as needed. If you select an existing Product or Service, their default description, quantity, price, etc are all auto-filled. These can be updated at any time for your current order if needing to create custom pricing/notes/etc for that order. For more information on products/services, click here.

Memo: This is where you can add in notes that will be visible on your Estimates, Work Orders, and Invoices. Clients will be able to see these notes.
Discount: You can add a percent discount to the entire order.
Tax Rate: You can select the tax rate on the order.
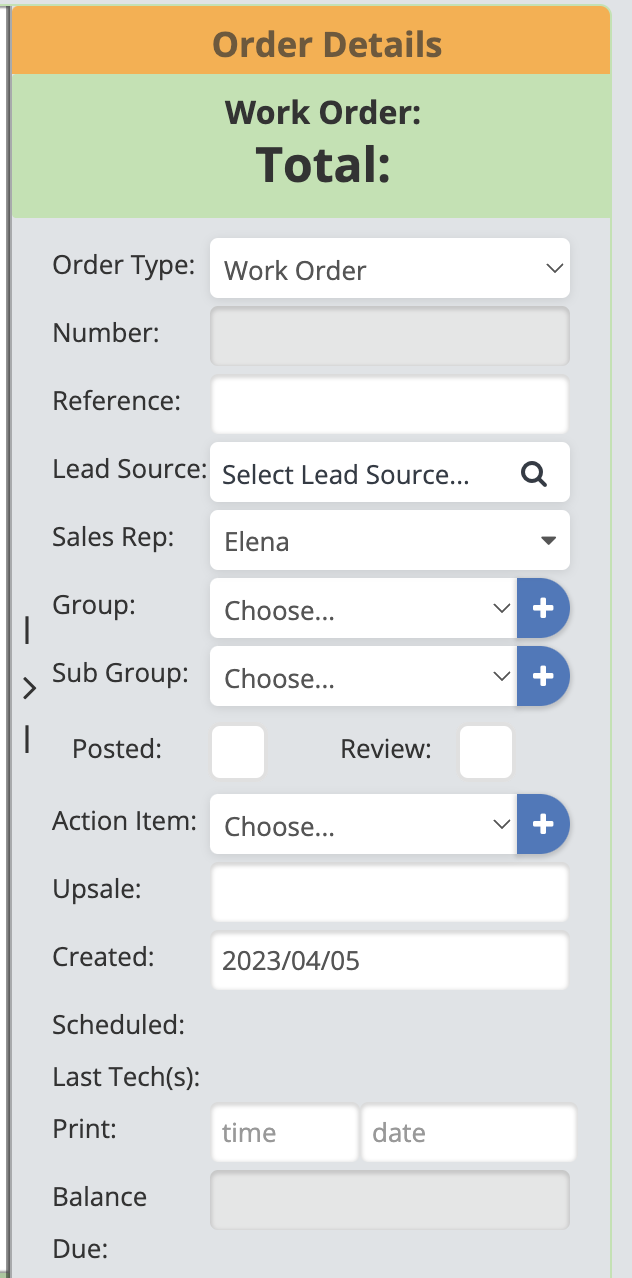
Order Type: You can choose if you are creating an Estimate, Work Order, or Invoice.
Number: This will automatically fill with the order number that generates once the order you are creating is saved.
Opportunity: You can select an opportunity account to connect this order to.
Reference: This is where you can add a PO #.
Lead Source: Choose a lead source for this order (Why your client is coming to your business/returning).
Sales Rep: You can choose a sales rep for the order.
Group: You can choose a grouping for this order.
Sub Group: You can choose a sub-group for this order.
Posted: Check this box if you do not want this order to be brought over the Quickbooks.
Action Item: This is an optional space where you can add in further details about the order.
Upsale: You can add in the amount of the Upsale on the order.
Created: You can change the "Created" date for the order.
Scheduled: If the order is scheduled, that information will show up here.
Last Tech(s): If the order is scheduled, the techs assigned to this appointment will show up here.
Balance Due: The total balance due on the order.
When finished, click "Save" to create the order.
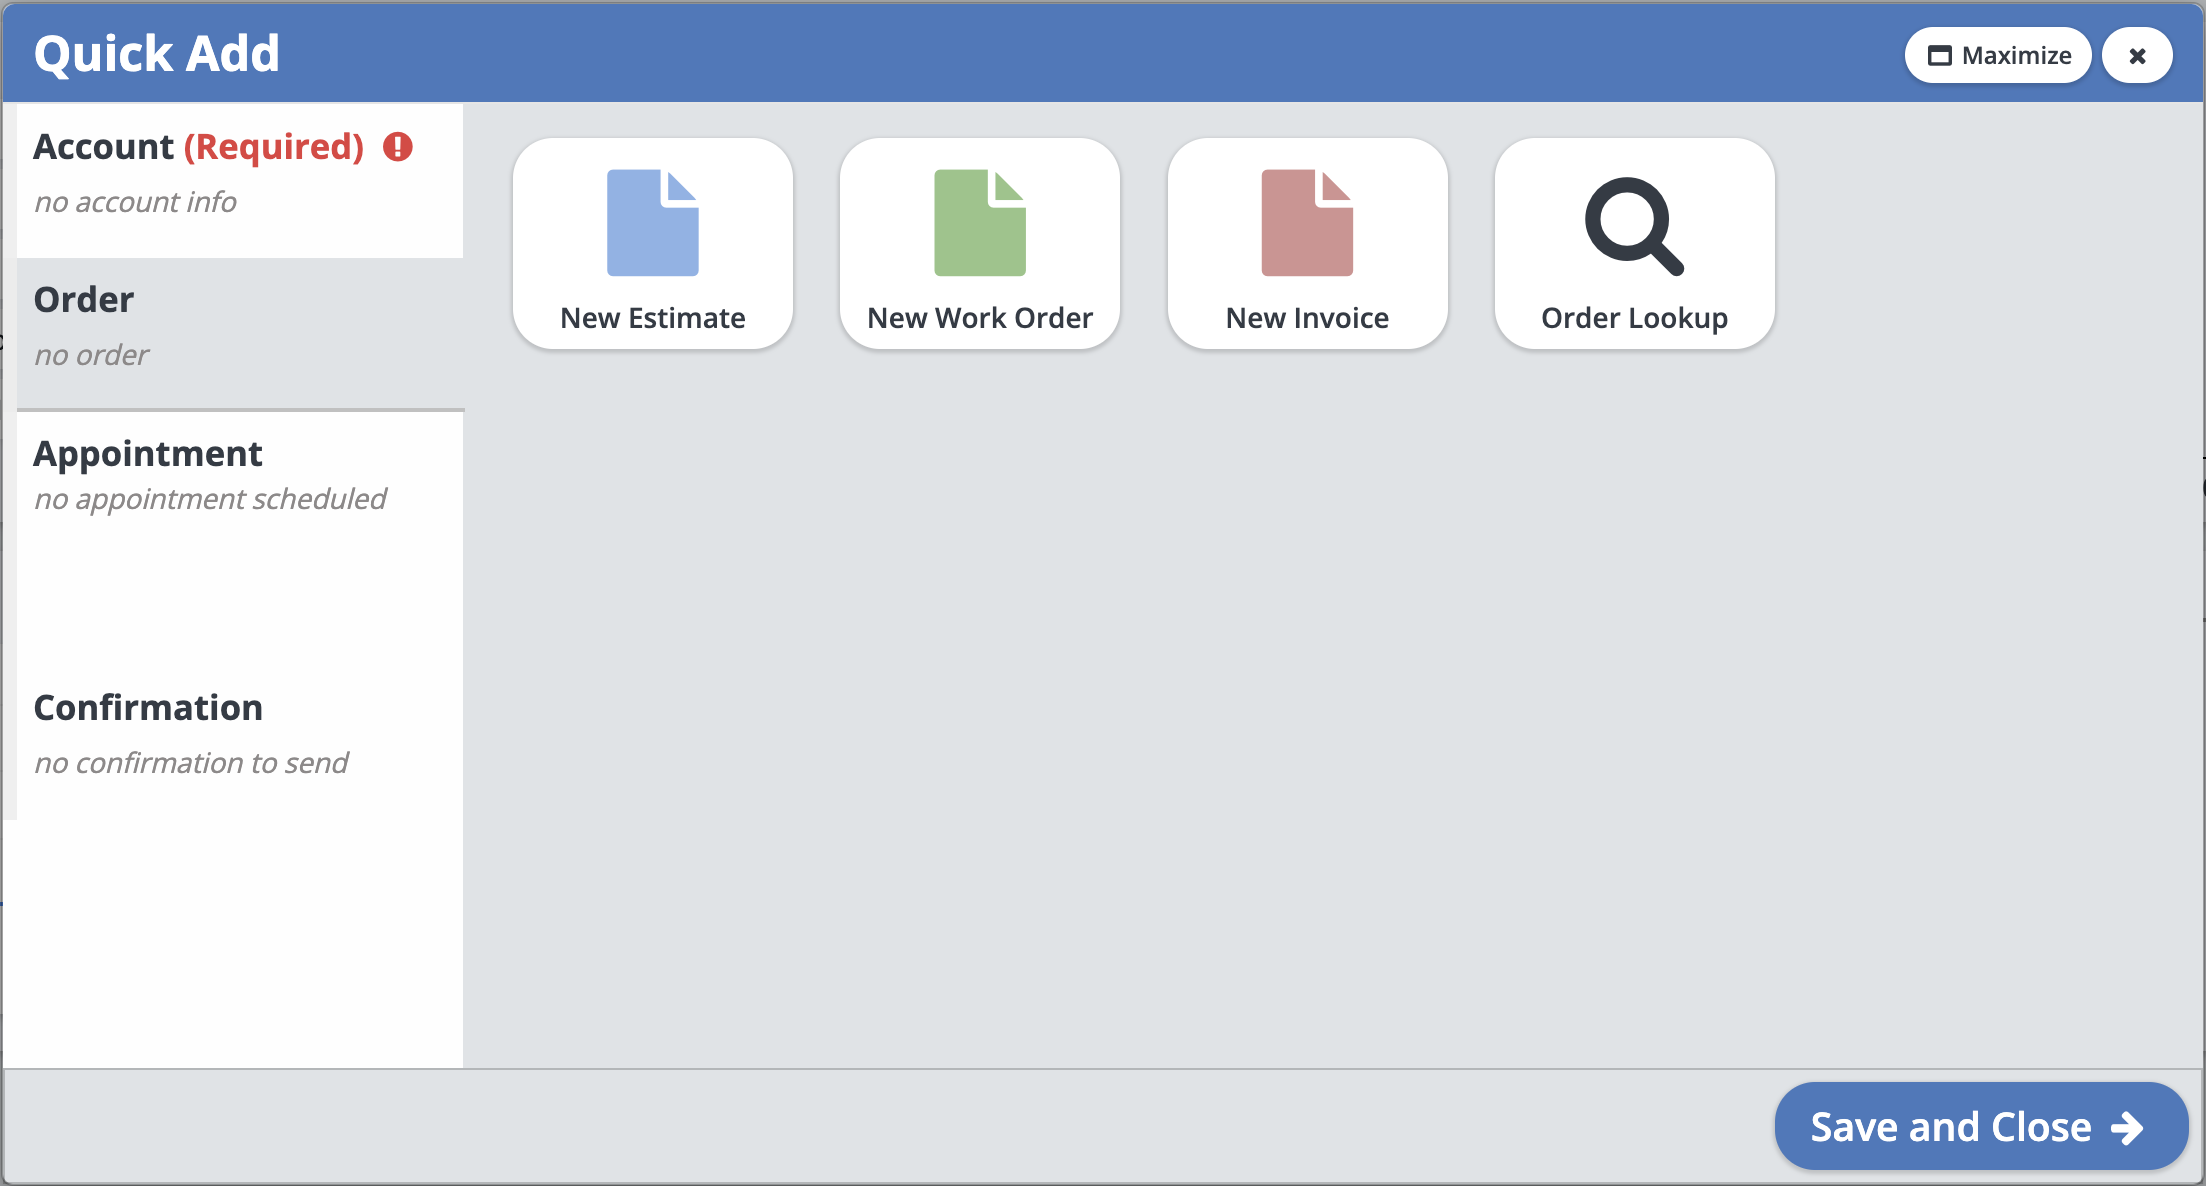
If you use the Quick Add, you will have a slightly simplified process for creating the order.
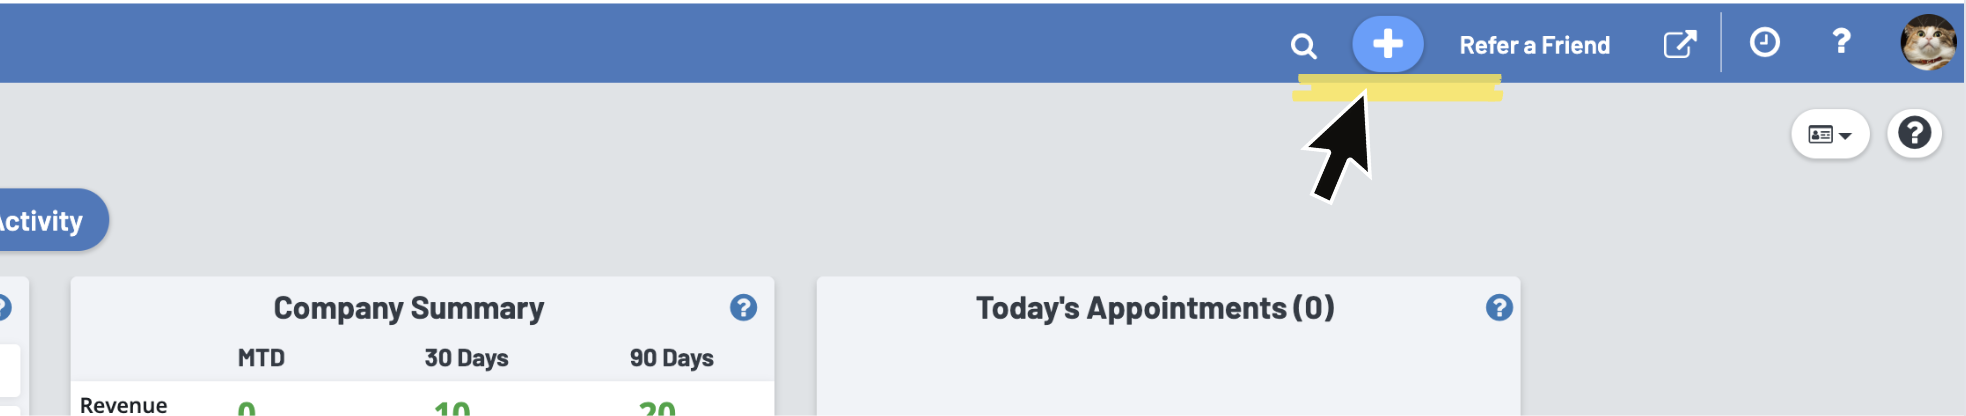
You can access the Quick Add from any page by simply clicking on the blue "+" at the top of the screen.
Your first step will be to start typing in a name and create a new account or select an account from the "Possible Matches" box.
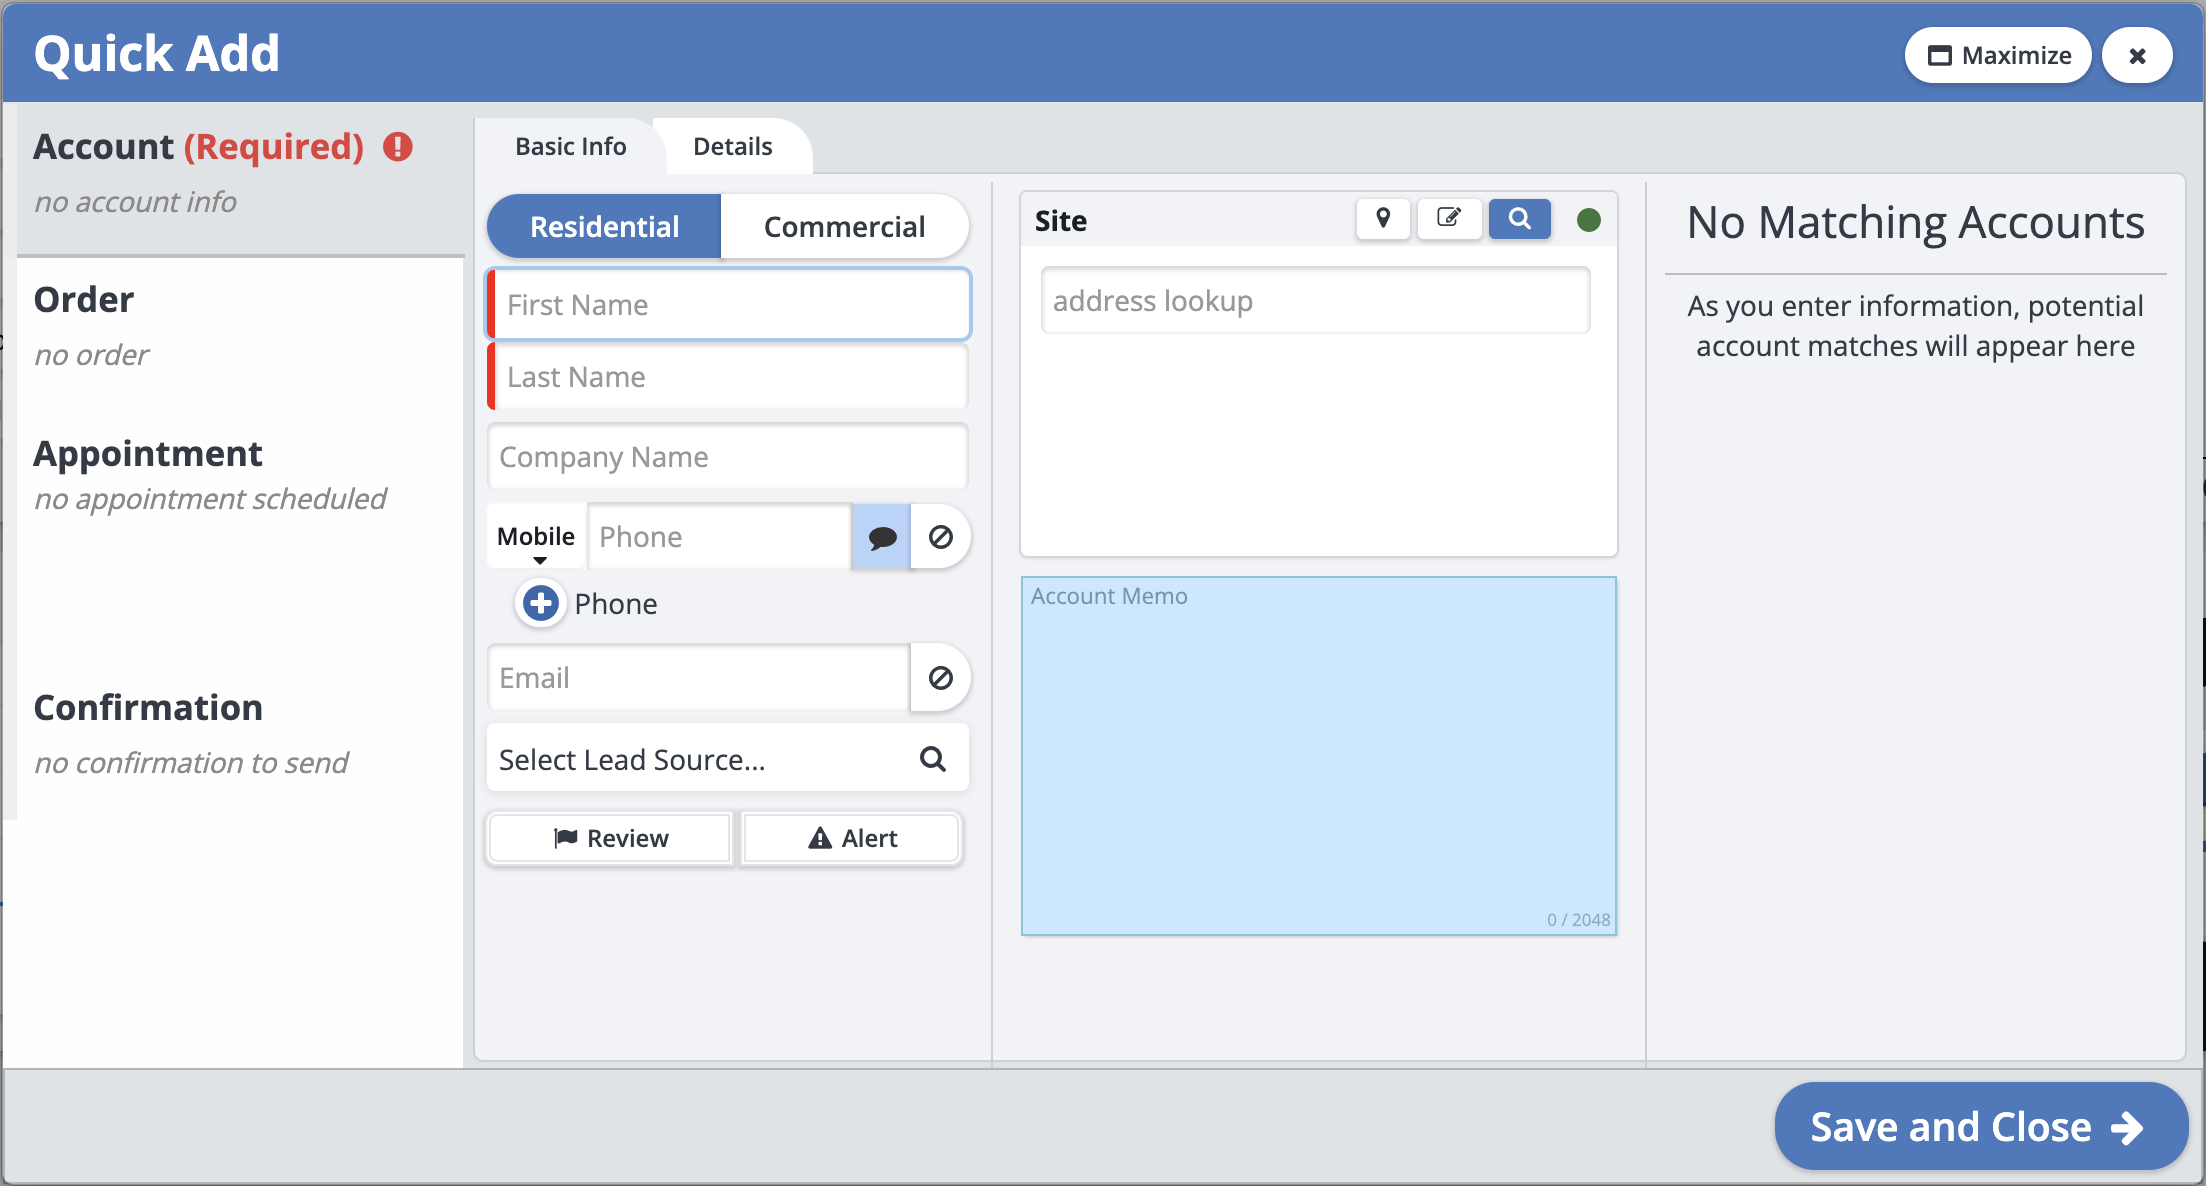
Once you have done that, you can click on the "Order" tab to start creating your order. Pick if you want to create an Estimate, Work Order, or Invoice.
Here you can add in your line items, a package, a promotion, and a lead source.
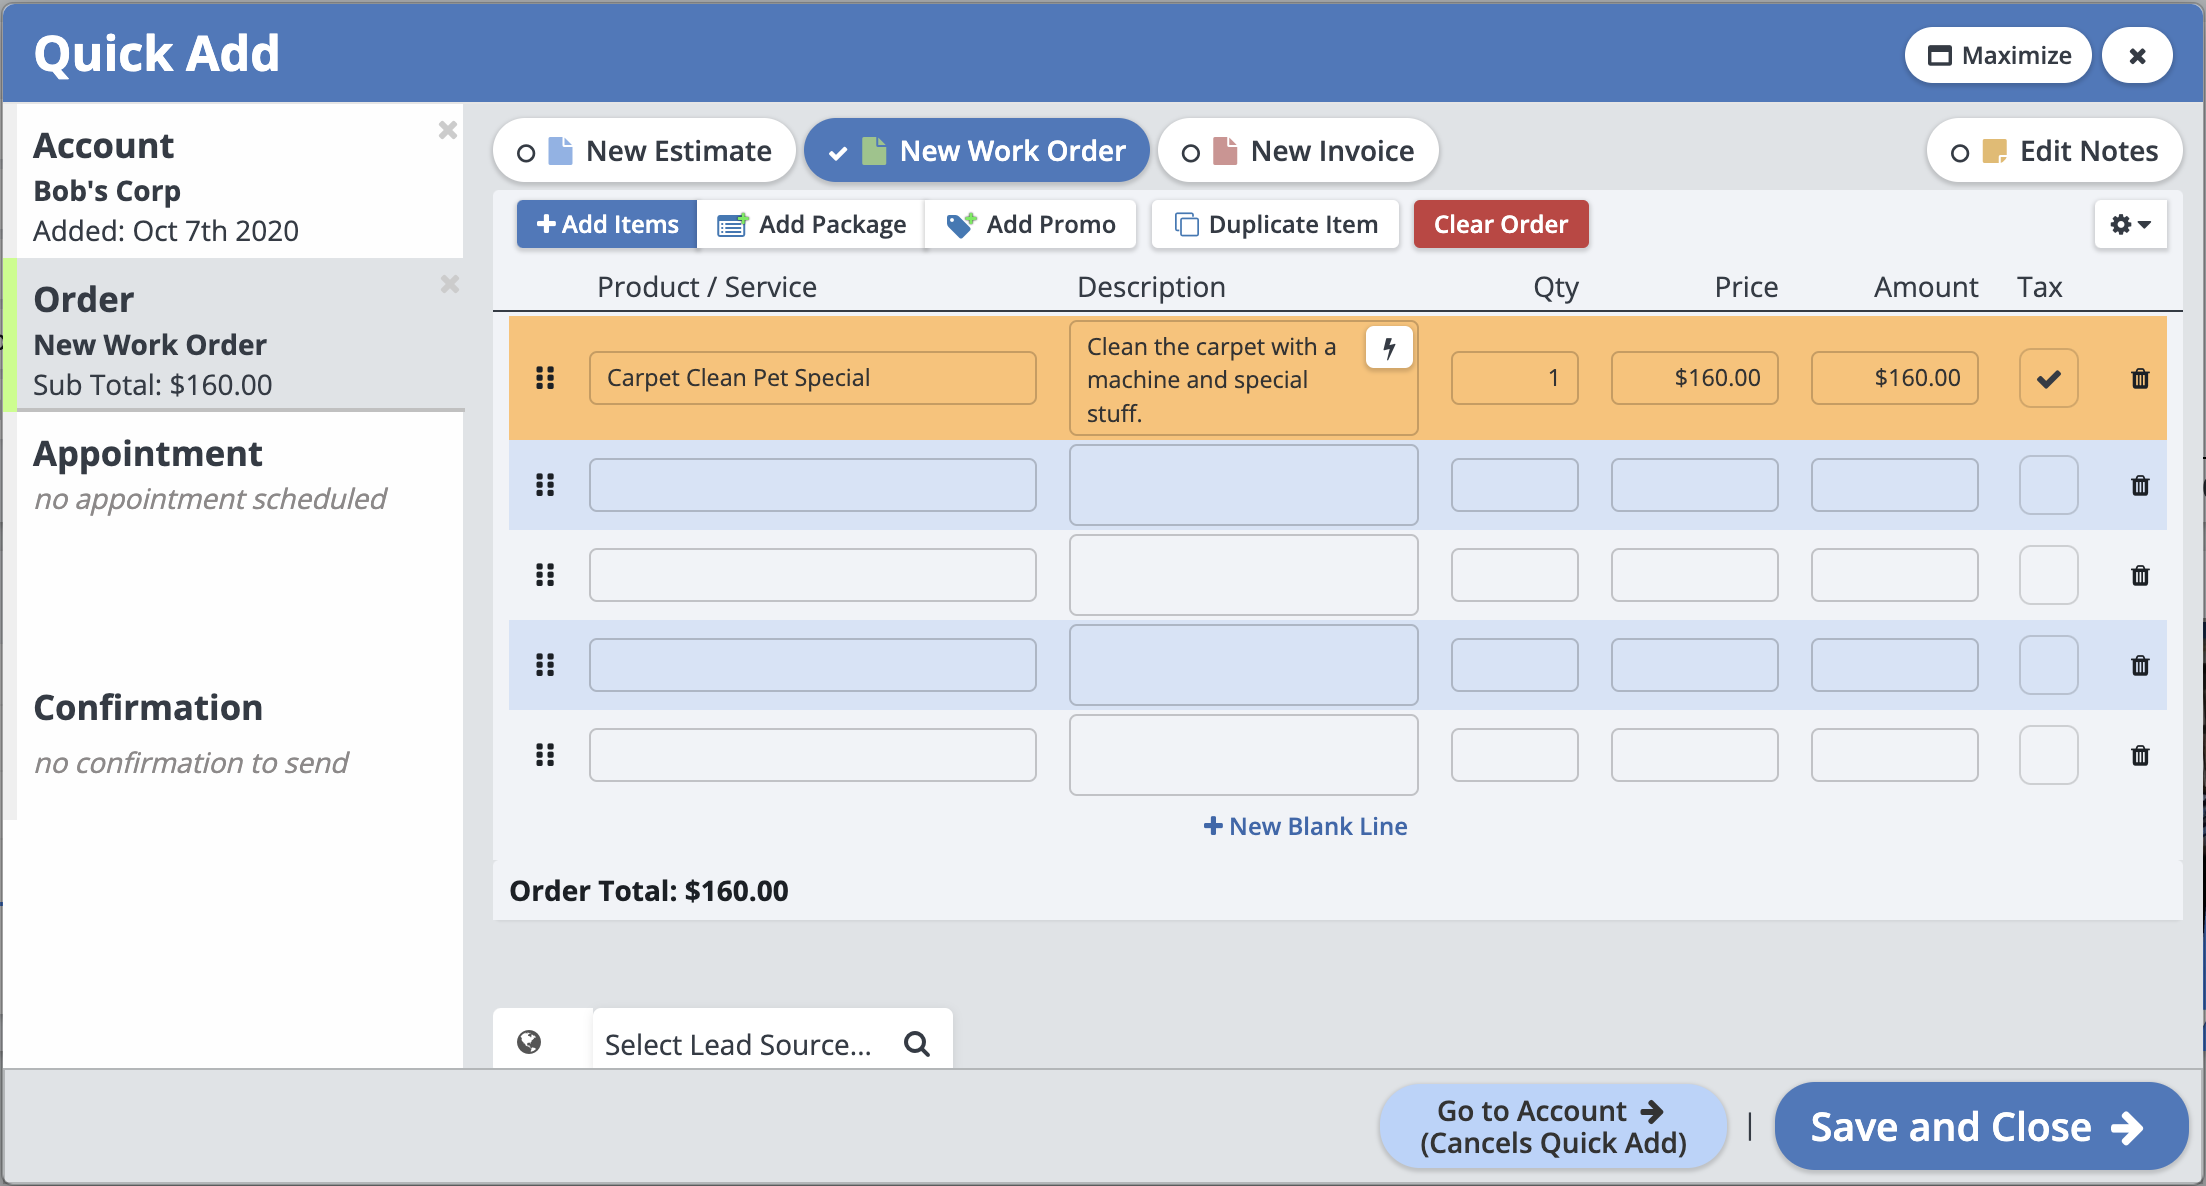
Once that is finished, simply click on "Save and Close" to create the order, or click on the "Appointment" tab to create an appointment for the order.

